The Hammer:
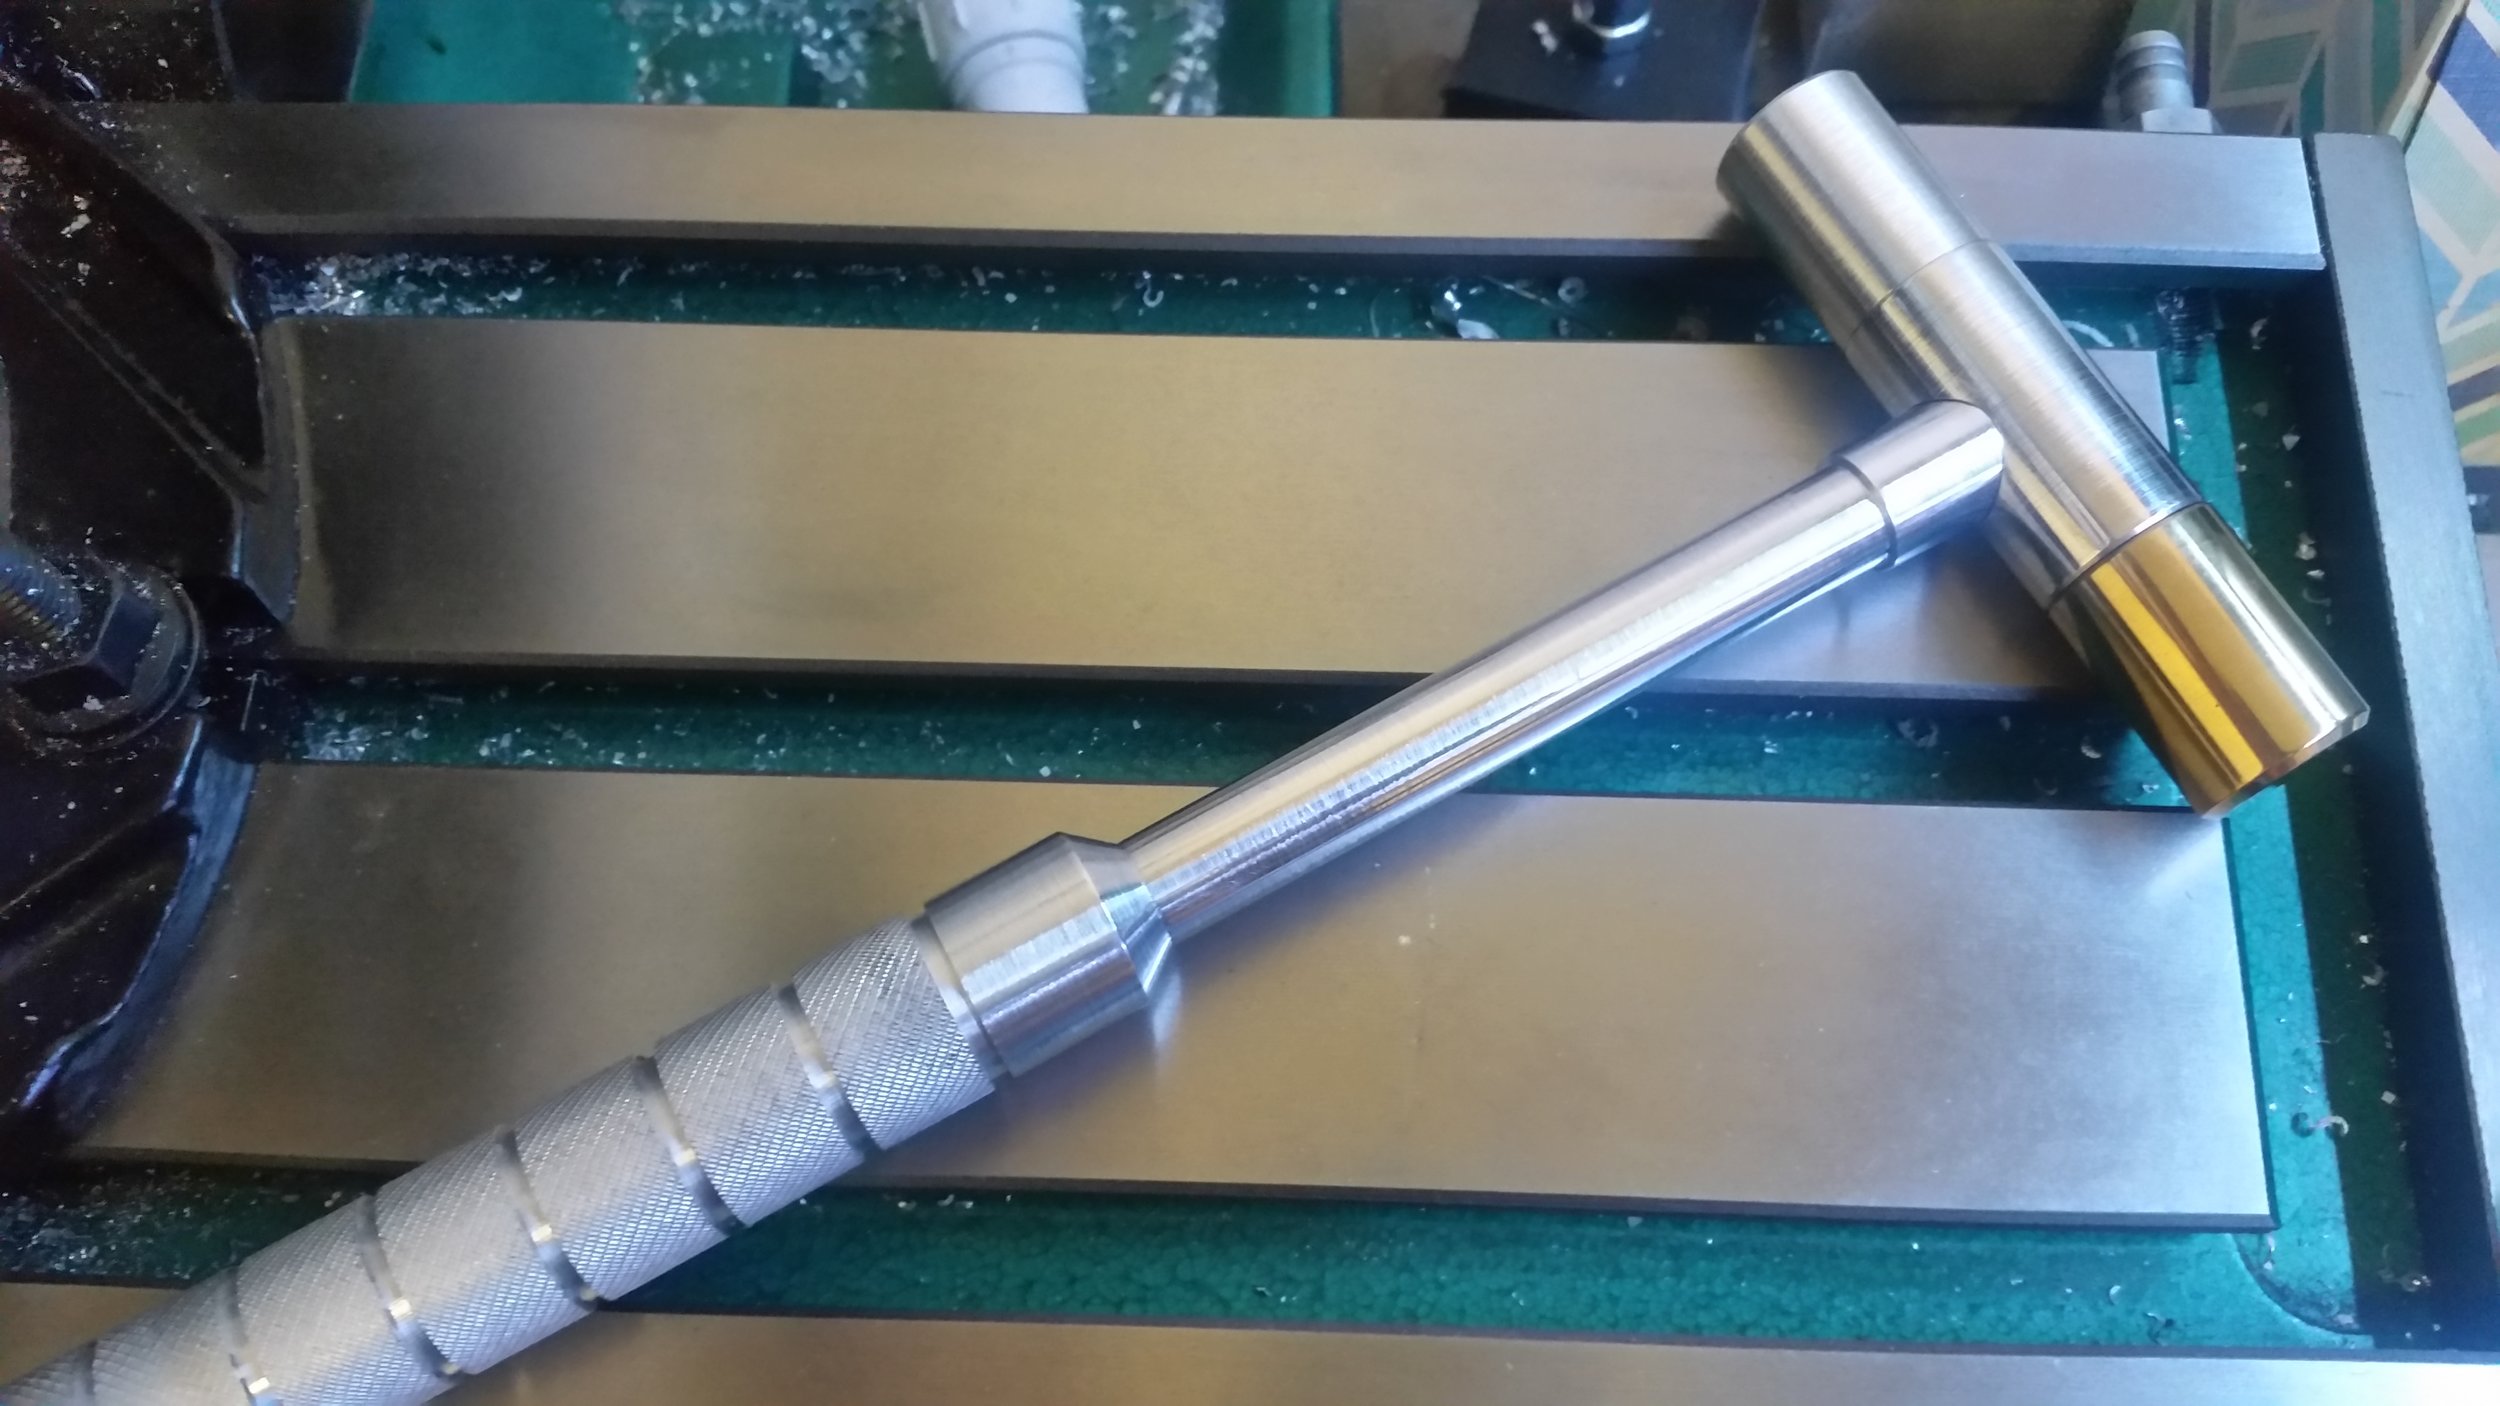
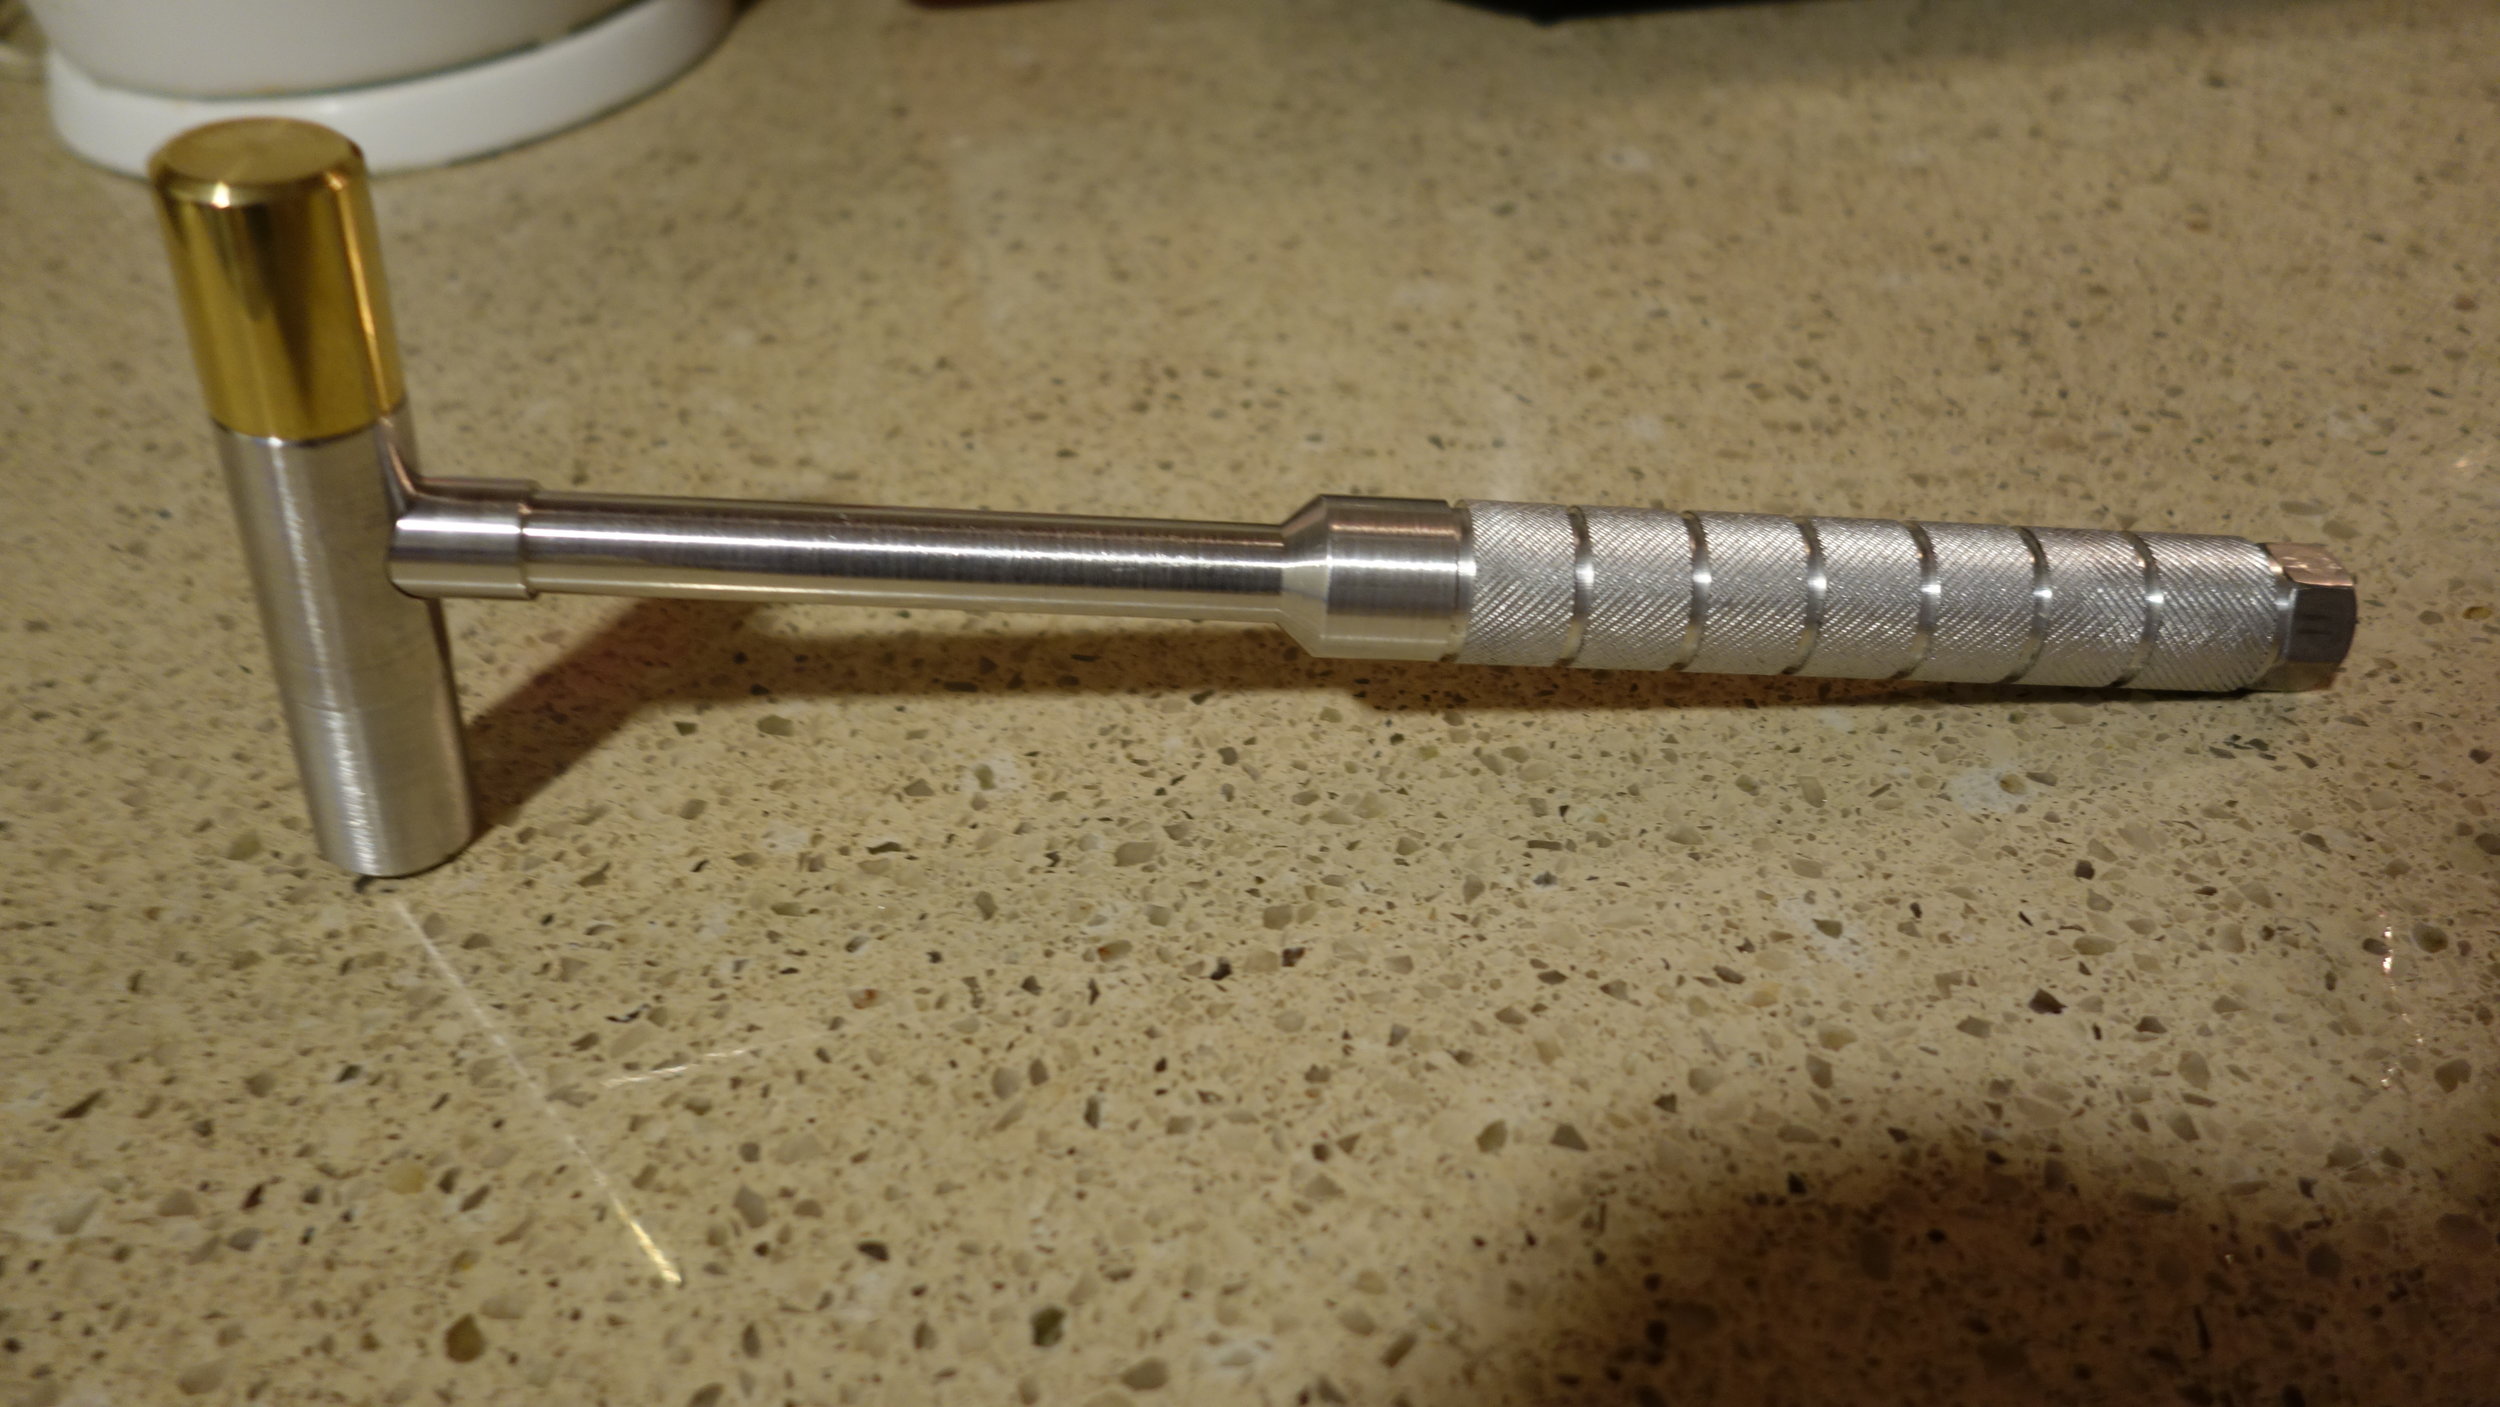
This is my first shot at a machinists hammer! It's 1.5 inches across at the cheek, with two 1.2" long detachable hammer heads and a 10 inch handle. The handle grip is 4.5" long with a fine/medium* knurled finish and accent grooves cut every 7/8ths of an inch. The hammer grip and head both have a diameter of 7/8ths, while the handle neck and step have diameters of 17/32" and 5/8" respectively. The design for this hammer was drawn from a bunch of different builds (see resources), and the actual dimensions were chosen as a middle ground between a small claw hammer and a my favorite ball-peen hammer from the student shop.
My goal with this particular build (in addition to making myself a hammer) is to explore the design process a bit, and in particular to get a feel for what specific features or qualities are desirable in a hammer. With that in mind, I've been carrying this hammer around with me for the last few weeks and plan to keep an updated reflections section below with my thoughts. This was a pretty quick and dirty build as far as machining projects go so I haven't documented it in great detail, but I have included a build log at the end of this post if you are interested.
*that is to say fine in one direction, and medium in the other.


Update and PDF:
7 years later, this hammer remains one of the highest traffic projects on the blog and “machinists hammer plans PDF” remains one of the most frequent google searches leading people to the site. With that in mind, I wanted to upload some rough drawings and provide a bit of an update. The documentation (PDFs and STEP files) can be found below, along with an FAQ .
Drawings: [click to download PDF]
CAD File: [click to download STEP]
Is the hammer still in use?
Yes! It is one of the 3-4 hammers I have in active rotation and for a while, when I was doing a lot of machine shop work, I even EDC'd it through a belt loop. Over the years I've used it for everything from adjusting machinery, to driving punches, to even (in a pinch) building up staircases and railings. These days it mostly stays home, but it still gets plenty of use in wood, leather, and home-repair projects.
Do you like the design?
On the whole, yes. Making the heads a standard stock size was a great decision, and I'm really happy with the three-head design. The handle has held up very well and remains comfortable for extended use (unlike the ribbed design I used on the deconstruction hammer). Keeping the profile thin was also a great call since it makes carrying the hammer as a general backup tool easy and comfortable.
Is there anything you would change about the design?
Functionally I could not be happier. Aesthetically, the hammer has proven very prone to picking up nicks and scratches in use. This is particularly an issue for the softer aluminum parts since they sit flush with the hammer heads and are thus not protected from any surface the hammer might be resting on.
If I ever get the chance to use this design in a shop class project I'll likely stick with the 2000 series aluminum and just provide a warning that dings are a fact of life for un-anodized aluminum tools. On the other hand, building a second version for myself, I'd be very tempted to switch over to a titanium for the handle and a 7000 series aluminum for the handle. There is also an argument for moving to a softer material for the polymer head, but that really just depends on its intended use case and the available stock.
The Process:
Before starting this project, I spent a while looking at other hammer builds, both commercial and by other students to get a feel for what kinds of things are possible or worthwhile in a hammer. The Projects I drew most heavily from are below in the "useful resources" section. That gave me a feel for generally what I wanted the hammer to look and feel like (tapered handle, knurled grip, interchangeable heads, etc).
The dimensions were based on hammers I was able to pick up and try at various places around campus (many thanks to Caltech's many shops for putting up with me and helping out). I really wanted this hammer to be small enough for me to carry around on a daily basis for scavenging, without being useless by virtue of being tiny. With that in mind, I ended up splitting the difference between a small claw hammer from the Blacker tool-room, and one of the ball-peen hammers in the student shop for the handle length. The grip length was based on a tracing of my hand on raw stock, scaled slightly to the nearest 1/8th.
I had originally planned to make the head 15/32", but after a bit of thought ended up scaling it up slightly to 7/8". The extra metal doesn't impact the weight too much, but having the hammer head be a standard stock size makes it much easier and faster to make replacement heads.
The Plan:

When I first set about trying to design a hammer, I very quickly realized that although I use hammers all the time, I didn't actually have any idea what made one particular hammer better or worse than any other. With that in mind I've decided to do this project a bit differently than usual. Rather than just diving in and building a hammer, I have broken the project down into three sections, respectively, design , Build, and Materials as outlined below:
This sub-project is intended as a design prototype. My main goal isn't so much to end up with a perfect hammer (though I do like it a lot), so much as it is to get a sense for what I do and don't like in a hammer. Now that it's more or less complete, I plan to carry this hammer around for the next few months, to get a feel for what I like about the design, and what I might change. I'll include my thoughts below under "reflections" for reference during future hammer builds.
The next sub-project will incorporate lessons learned from this one, and will be focused mostly on the manufacturing process itself. The build prototype will be made up in CAD beforehand, and made strictly to those dimensions with the goal of hitting tight tolerances at each step. I will also document the build process for this hammer much more extensively for use as a reference and possibly as teaching material for the metalworking club.
The final sub-project will incorporate lessons learned in the first two, and be focused mainly on materials selection. In particular, I plan to do substantial research into what alloys are appropriate for each part of the project and why. Like the second build, this project will be sketched in CAD beforehand and built to match that model.
A hammer in it's natural habitat...
Useful Resources:
This particular build is pretty experimental in nature, and isn't specifically based on any one of the designs or builds below, but I did find all of them useful references, and drew liberally from the lot when designing my own hammer.
Reflections:
Assembly:
The hammer pommel can be used as a head storage location if the handle is roughly the same size/styling as the hammer cheek.
Using a tap/die worked fine for prototyping, but the results ended up being pretty knarly. For future builds it would be well worth the setup to use the lathe instead.
Making knurled lengths a multiple of 5/8" (or another standard measurement) makes it easy to add additional grip of needed.
A high-low finish (used 60 and 1200) hides scratches much better than a mirror finish.
The screw-on cheek works well, but tempts people to unscrew it. A press fit hammer head might work better.
With intensive hammering, the heads can work themselves a bit loose. This can be fixed by adding o-rings or tapers to the head-cheek interface to increase friction.
The threaded head can turn under heavy hammering (which does happen). For intended use it's fine, but a bit of supper glue eliminates the issue. For new hammers would recomend a press fit or similar.
Design:
Chamfering the head-cheek interface of the hammer is a nice way to hide an imperfect fit and adds a bit of welcome definition to the profile.
The nut-as-a-pummel design works pretty well, but still looks a bit out of place. Future builds should have a real pummel or use that space for some sort of storage.
Having a rounded pummel would give the user something to play with while holding the hammer. (Jim.)
If their are parts of the hammer you don't want people looking like, you can use makers marks or flats to draw the eye. (Jim.)
Having a head that is harder than aluminum for hitting steel and disassembly could be pretty useful. The aluminum does fine, but it's getting pretty beat up.
The hammer cheek should be at least as heavy as one of the heads. Otherwise, having one heavy head and one light head makes the hammer pretty unbalanced (recommend trying a steel cheek).
Build Log:

Aluminum stock from the stock room. (No pictures of the brass stock sadly.)
1/31/2017 - Got 2ft of 7/8 aluminum stock from the stockroom. Cut a 12 inch length on the Johnson saw and faced both ends. Took size down to 11.5 inches and turned the 0.6 inches on each side down 0.495 inches. Threaded both sides with 1/2-13 using a die (would use lathe and cutter if student shop had one, worth making a new one before next build). Faced 0.1 inches off both ends and cut a slot at the base of each threaded section. Cleaned up both ends with a file and used a center-drill to add live-center hole (will be important later) to both ends. The threads came out a bit knarly on both sides, but using a functional (not chipped) cut-off tool should largely mitigate that.

Handle threads. you can see the reliefe cut is not deep enough just yet.
2/1/2017 - Turned an 11/16" length of the handle down to just under 5/8". Then turned an additional 2 and 11/16 inches to 17/32". Used the edge of the insert to cut a taper to 7/8". (Dictated by the single insert and holder in the student shop. STRONGLY recommend against doing this.) Used side-knurler to knurl a 4 and 5/8 inch length form the other side of the handle. Student shop knurler was finer than expected and in poor repair. Used a parting tool to add a 3/32" slot every 5/8" inches starting at the inner edge of the knurling.

Cutting the aluminum test head out of scrap.
2/1/2017 - Cut a 2.8" length of 7/8 aluminum stock for the hammer head. Faced both sides and made holes for later use in turning the piece on centers. Turned a 0.5" length to 0.495" and used the parting tool to cut a 3/32" slot 7/64" deep. Turned the piece and faced the other side for a total length of 2.125" and then repeated the process used on the other side.
2/2/2017 - Cut 1/2-13 threads onto both ends of the hammer head with die. (Should definitely be done with cutting bit in the future.) Clamped hammer head in mill and used edge finder to locate middle of piece. Drilled one 27/64 hole 11/16 into the side, then cut a 5/8 flat (use appropriate center drills and the like).

Cutting the threads and pocket that connect the hammer's cheek to its handle.
2/2/2017 - Chucked 7/8ths aluminum bar. Faced piece. Center drilled and then drilled a 27/64 hole into face. Cut 1/2 inch threads to a depth of .6 inches. Cleaned up exposed face with a file. Used a parting tool to part off 1.2" and then chucked with parted side facing out. Faced exposed side and used cross slide to add 45 degree chamfer. Screwed onto hammer head and sanded/polished hammer face to a brushed finish. Repeated same process with brass stock, but polished to a mirror finish.
2/3/2017 - Attempted final assembly. The threads for both sides of the handle were significantly drunk, likely due to poor form when using the die that was largely resolved for the head threads. Used a file to clean up the handle-thread interface and added a bolt to the pummel in place of a third head which would not sit flush.
2/14/2017 - Added 4/8" (ID) o-rings to the undercut at the base of each threaded end of the cheek.
Page Updated: 1/14/2023