My guess is that if you are reading this then Blacker has decided to do a river for interhouse and you were foolish enough to volunteer (It's actually an easy project aside from the paperwork). This page outlines how we did the river for Blacker's 2017 "Japan Through Time" interhouse, but the design is modular, so you should be able to use it for whatever setup you want. For the pump system and waterfall I have included notes from our postmortom design review with things to watch out for or possible improvments that could be made to the system.


River Sections:

The river itself is composed out of 8ft sections (see right). Which can be built before hand and then raised to height and connected when needed. These units are intended to be single-interhouse and so emphasize cost over durability. That said, they should be good for a few short uses.
The assembly procedure we used for each 8ft section runs as follows:
Cut the two 6" lengths, two 4' lengths, two 22.5" lengths and the 18" by 8' plywood section.
Lay out two 2.x3s 18" apart (from outer edge to outer edge) and check that they are parallel (if bowed, place so the center bulges).
Put a continuous line of glue down each board (this acts as a last ditch sealant).
Place the plywood on the two boards and fix it in place with a screw at each corner. As far as we can tell it is safe not to drill pilot holes if the house is out of bits.
Add a screw and washer every 6-10 inches down both of the two 2x3s.
Measure 33 inches from opposite corners of the structure and secure the two 6" sections with two screws. It is important to drill pilot holes.
Connect one 4' sections to the main structure 36" inches in from the ends using a single screw. It is important to drill pilot holes.
At this point the structures can be moved into place, lifted, and then the legs can be fixed in place using an additional screw at their pivote points and two screws where they cross eachother. I find it also helps to add two braces connecting the sides. Once the structures are in place, make sure to use hot glue (or simiilar) to seal any remaining cracks. This is best done last since moving them will open up new leaks.
Note: During our post-party design review we determined that the seal between plywood and the 2x3s would be improved by the presence of a 1x3 underneath providing additional support. This board should be pre-bent so that it can be used to compress the plywood against the 2x3s. This should help prevent the small leaks that sprung up on 3 of the 4 sections we deployed. This design can be found in the V2 version of the uploaded documentation.
Unit Cost: 15$
Unit Time: 30 min
Materials:
[4.5] 2x3 soft wood.
[40] 1.5" Deck-Mate screws (go torques).
[5] 1cm diameter sticks of hot glue
[1/12] of a medium sized bottle of Elmers wood glue.
[1] 18in by 8ft section of thin plywood or press-board.
Documentation:


Water Reciculation

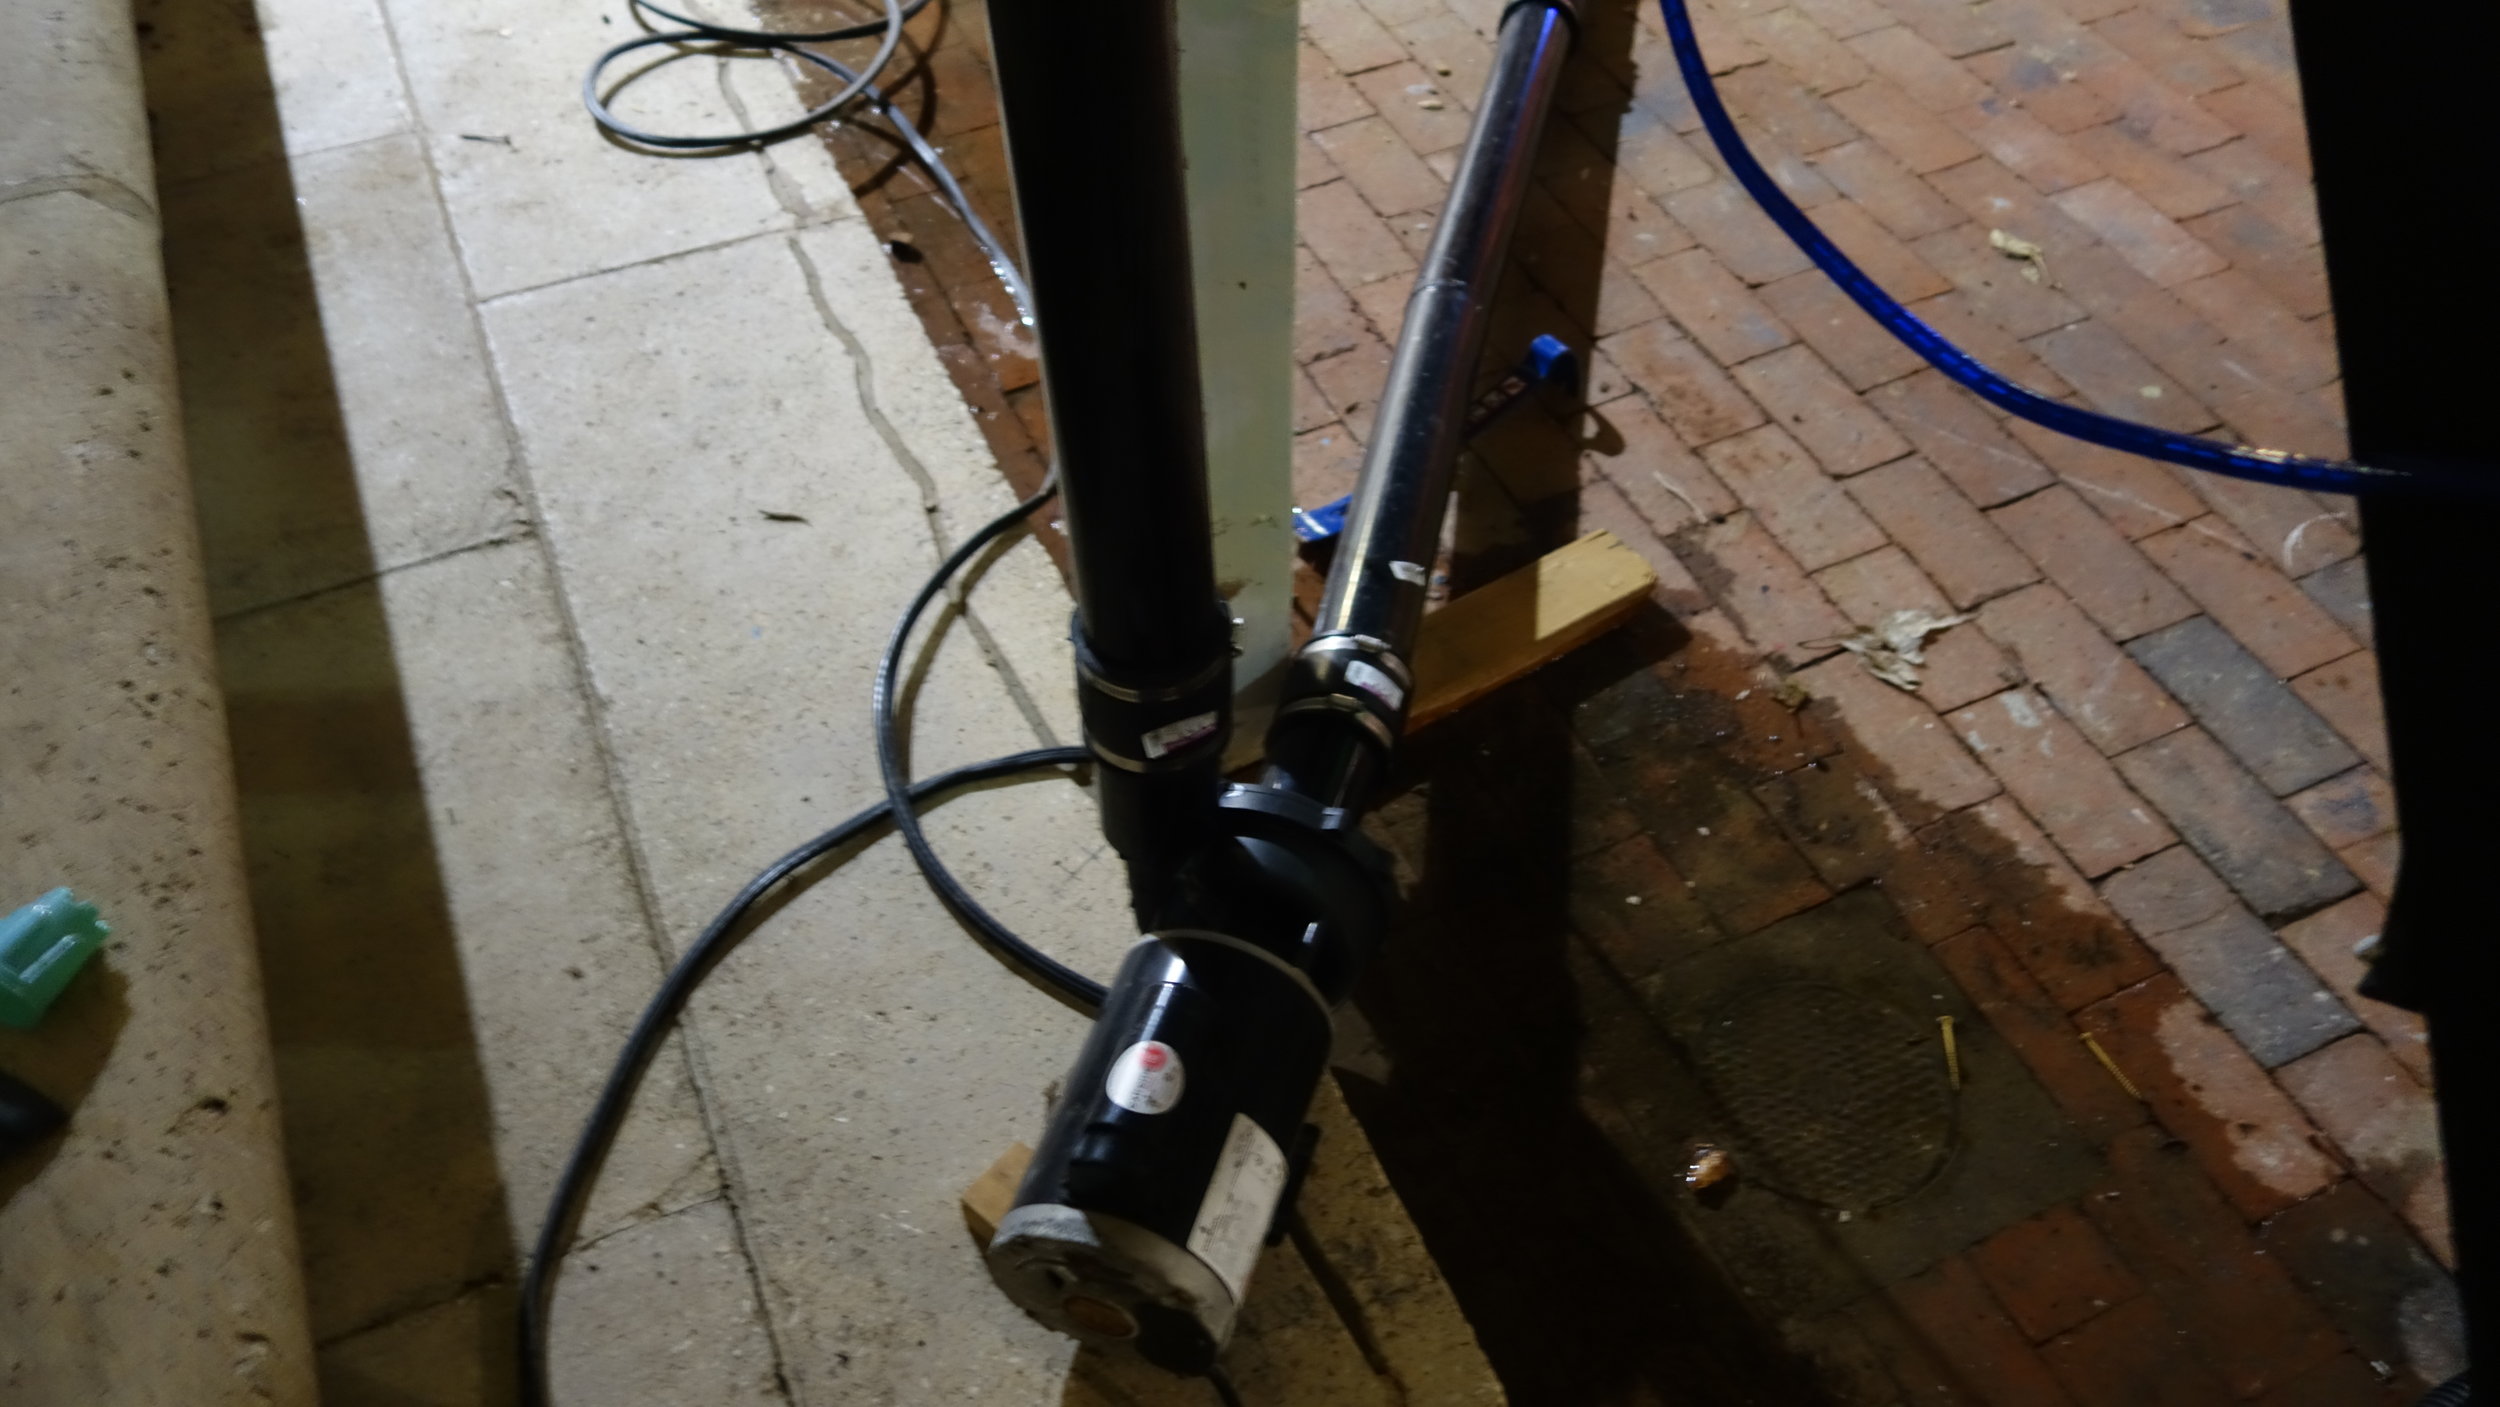
Water for the river is pulled from the catch basin, down a length of 3" pipe, and into the pump. It is then pushed up to the waterfall, where it runs out a series of holes drilled in the bottom of the pipe. It then falls down the waterfall, entering the river. The remaining water is then piped back to the collection basin to be re-circulated. Of particular note, the pump sits at the bottom of the waterfall structure and below the level of the water in/out takes. This allows the pump to be primed by poring water down the intake until it begins to overflow back into the basin.
By far the hardest part of this project was getting the pump system to play nice without giving party-goers an impromptu shower. The pump is significantly more powerful than we had anticipated, and left to it's own devices, was more than happy to project the waterfall a good 3-4ft beyond the catch basin that feeds the river. To lower the pressure, we ended up having to add another stretch of pipe returning unused water to the collection basin. This is clearly not the ideal solution, it would have been nice to pump that water into the river itself instead, but it did work and kept safety happy.
One thing to keep in mind is that the pressure on fittings after the pump seems to be much greater than on fittings before it. It is well worth clamping or gluing any right-angle fittings or the like on the water return run. On a similar note, it is worth watching the system for a bit after starting it up, because temperature effects from the cold water will change the fit of any press-fit fittings during the first 5 or so minutes of operation.
If you end up using one of the houses's large sump pumps it is worth thinking about how you are planning to prime the pump before building the system. In our case we found that placing the pump below the water intake level, and then not gluing one of the fittings so the intake can be trivially turned up and used to fill the lowest foot of the system was sufficient. However, what works will depend on how your system is constructed. The important thing is that you have a way to flush bubbles out of the path from the intake to the pump.
Notes:
3" pipe is much more expensive than 2". Make sure to do flow tests to determine which you need before purchasing your piping (3" is probably overkill).
Placing "spoilers" or some other mechanism to slow water passing over the holes should help increase flow.
Make sure the pump is below both the intake and the outtake to the system. That will make it much easier to prime.
Any fitting which changes the direction of water such that the flow pushes against it should be glued or clamped in pace.
Having at least one flexible fitting in each straight run to reduce the risk of cracking is well worth the extra cost.


Water Fall
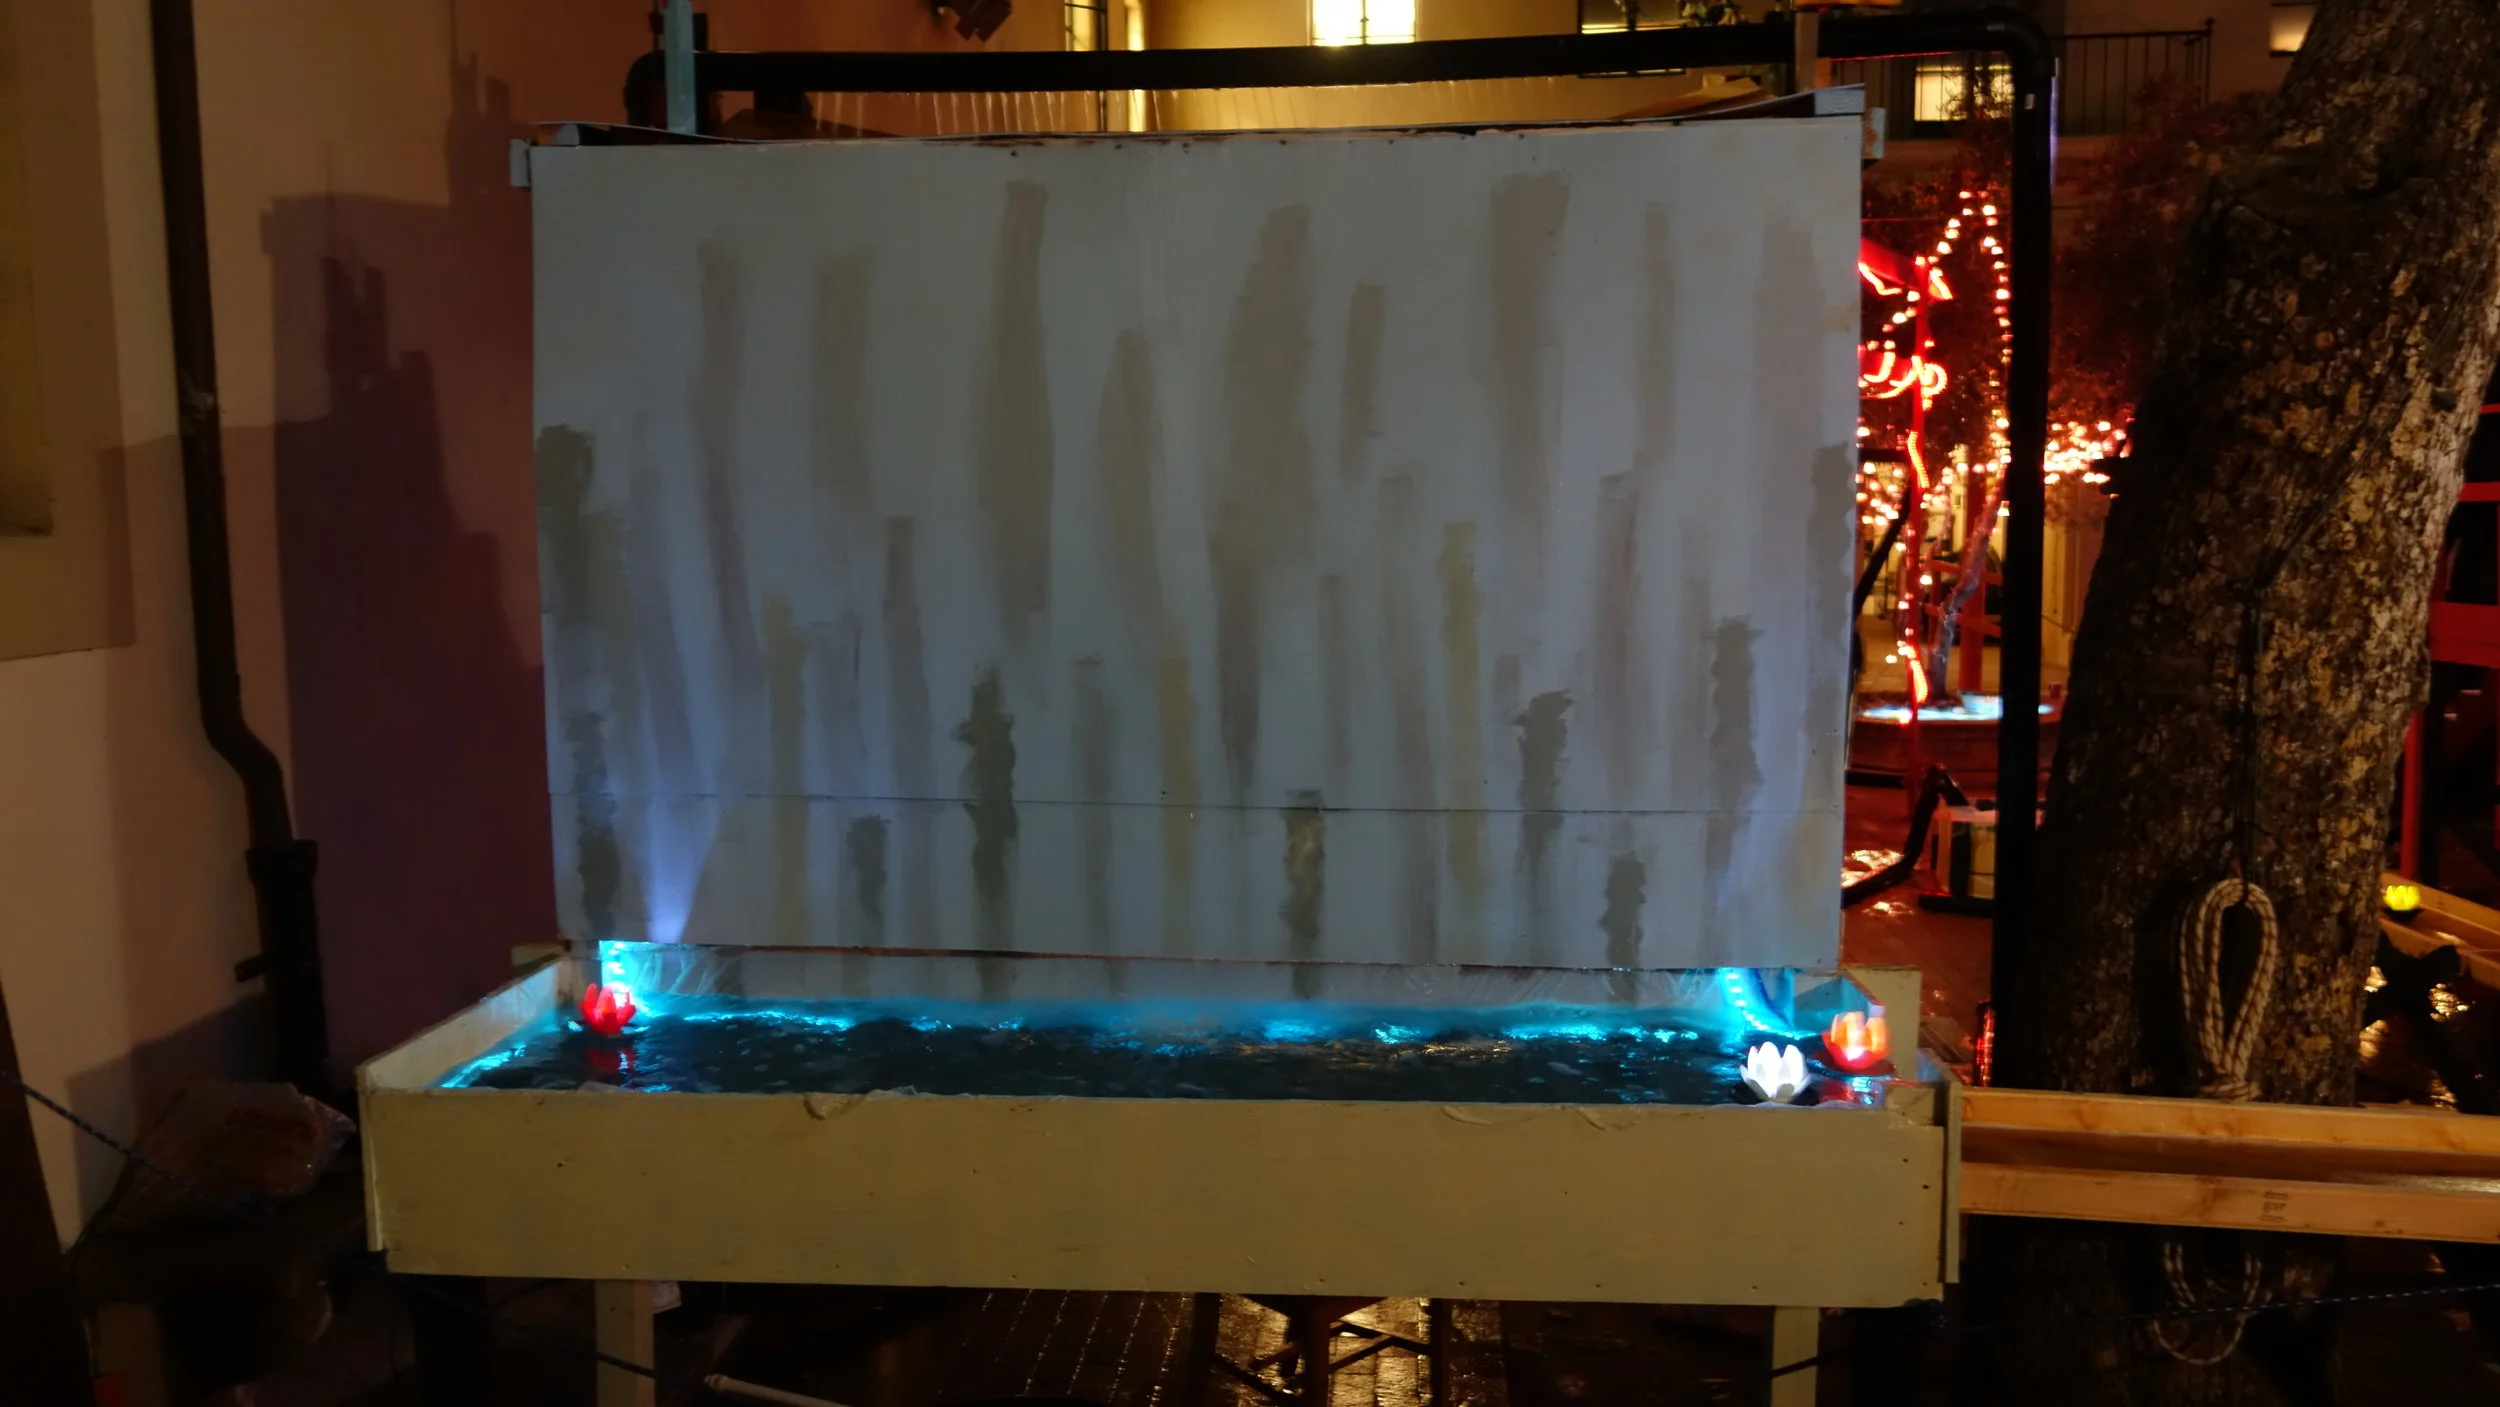
After a bit of back and forth, we decided to start the river off at a waterfall and end with a catch basin (vs flat with recirculating water). That helped us hide the pump mechanism, and gave us an impressive backdrop to the left for folks entering the North Gate. Ultimately, we ended up building a platform, and then using a single contiguous piece of thin plywood to form the upper basin for the river. That worked reasonably well, but I'm not totally happy with the solution we came up with, so rather than post a detailed build log, I have included a few lessons/ideas that we picked up along the way below. In a similar vein, you will also find - below - notes from our post-project design review detailing how we think the the waterfall could be done best, and with as little pain as possible in the future.
The general design that we settled, more as the result of time than anything else, was an 8' by 8' by 4' frame made out of 4x4s and braced with 2x4s. We then used 2x4s of varying heights to bend a single sheet of 1/4" plywood so that it would direct water over the intended edge. The water itself was provided by a 3" pipe with holes drilled in the bottom. The waterfall overflowed into a 2' by 8' by 1' catch basin and from there into the river proper.


Notes: (Design Review)
Check the waterfall distance/behavior before building a catch basin for it, could be it needs to be larger than you expect.
Screw a line of 2x4s 3 '- 4' below the top of the platform where they can be used as scaffolding (a built in ladder is really nice as well).
Using an upper basin with the water spilling over a lip will help create a nice even sheet of water.
Creating the upper basin and structure desperately may make it easier to maintain the basin and keep it rigid.
Make sure the Calk you use is rated for water (oops) and that you finish early enough to let it dry for 2 days before the party.
Building a ladder and some scaffolding 2x4s to allow easy access to the entire structure (would recommend a single line running 4' below the top) would make maintenance and assembly much easier.
Notes: (During Construction)
Calk not hot glue!
The top of a tall structure like the water fall will flex enough to break wood to wood calk bonds when picked up and moved.
Black plastic can be pained, although it stops being waterproof if you use staples.
Plywood bends way way better when wet (soak for 2-4 hours in warm water).
Surface tension means that getting a uniform sheet of water from a flat surface is hard. If you need even distribution it can help to build a small lip and then cut channels through it.
Clear plastic drop cloth from home depot turns actually clear under water (whenever possible better than black plastic).
You can soak thin plywood sheets and then bend them to get continuous water tight surfaces as needed.
Water will stick to drop-cloth and adhere it to nearby surfaces, so if you have leaks you need to direct towards more productive destinations than the bricks, that can be a good way.
Most leaks don't really show up until the wood and plastic have had a chance to saturate. That takes around 20 minutes, but once that's take place they don't seem to get much worse until the wood starts to warp (by which time interhouse is hopefully over).
Pictures:
Because pictures are never a bad thing.


