More Fire...
I have been smelting using charcoal and forced air for a little while now. Charcoal is great, because it's cheap and very easy to set up (All you need is charcoal and a hair drier). That said, it can be difficult to get coal fired furnaces up above 700c. Now that I have a bit of time (it's summer, yay!) I have converted my smelter to run on a propane torch, the construction of which is detailed below.
The design I settled on is a stripped down version of a build by "Turner Forge" on youtube (resources). This is definitely not the highest efficiency build, for starters the air intakes are not in line with the flow, and the 1/16th drill bit I used was about 3 times larger than ideal. The way I built this was also epoxy heavy which will make modification a bit hard. That said, if you are looking for a simple, very low cost, build then this is for you.
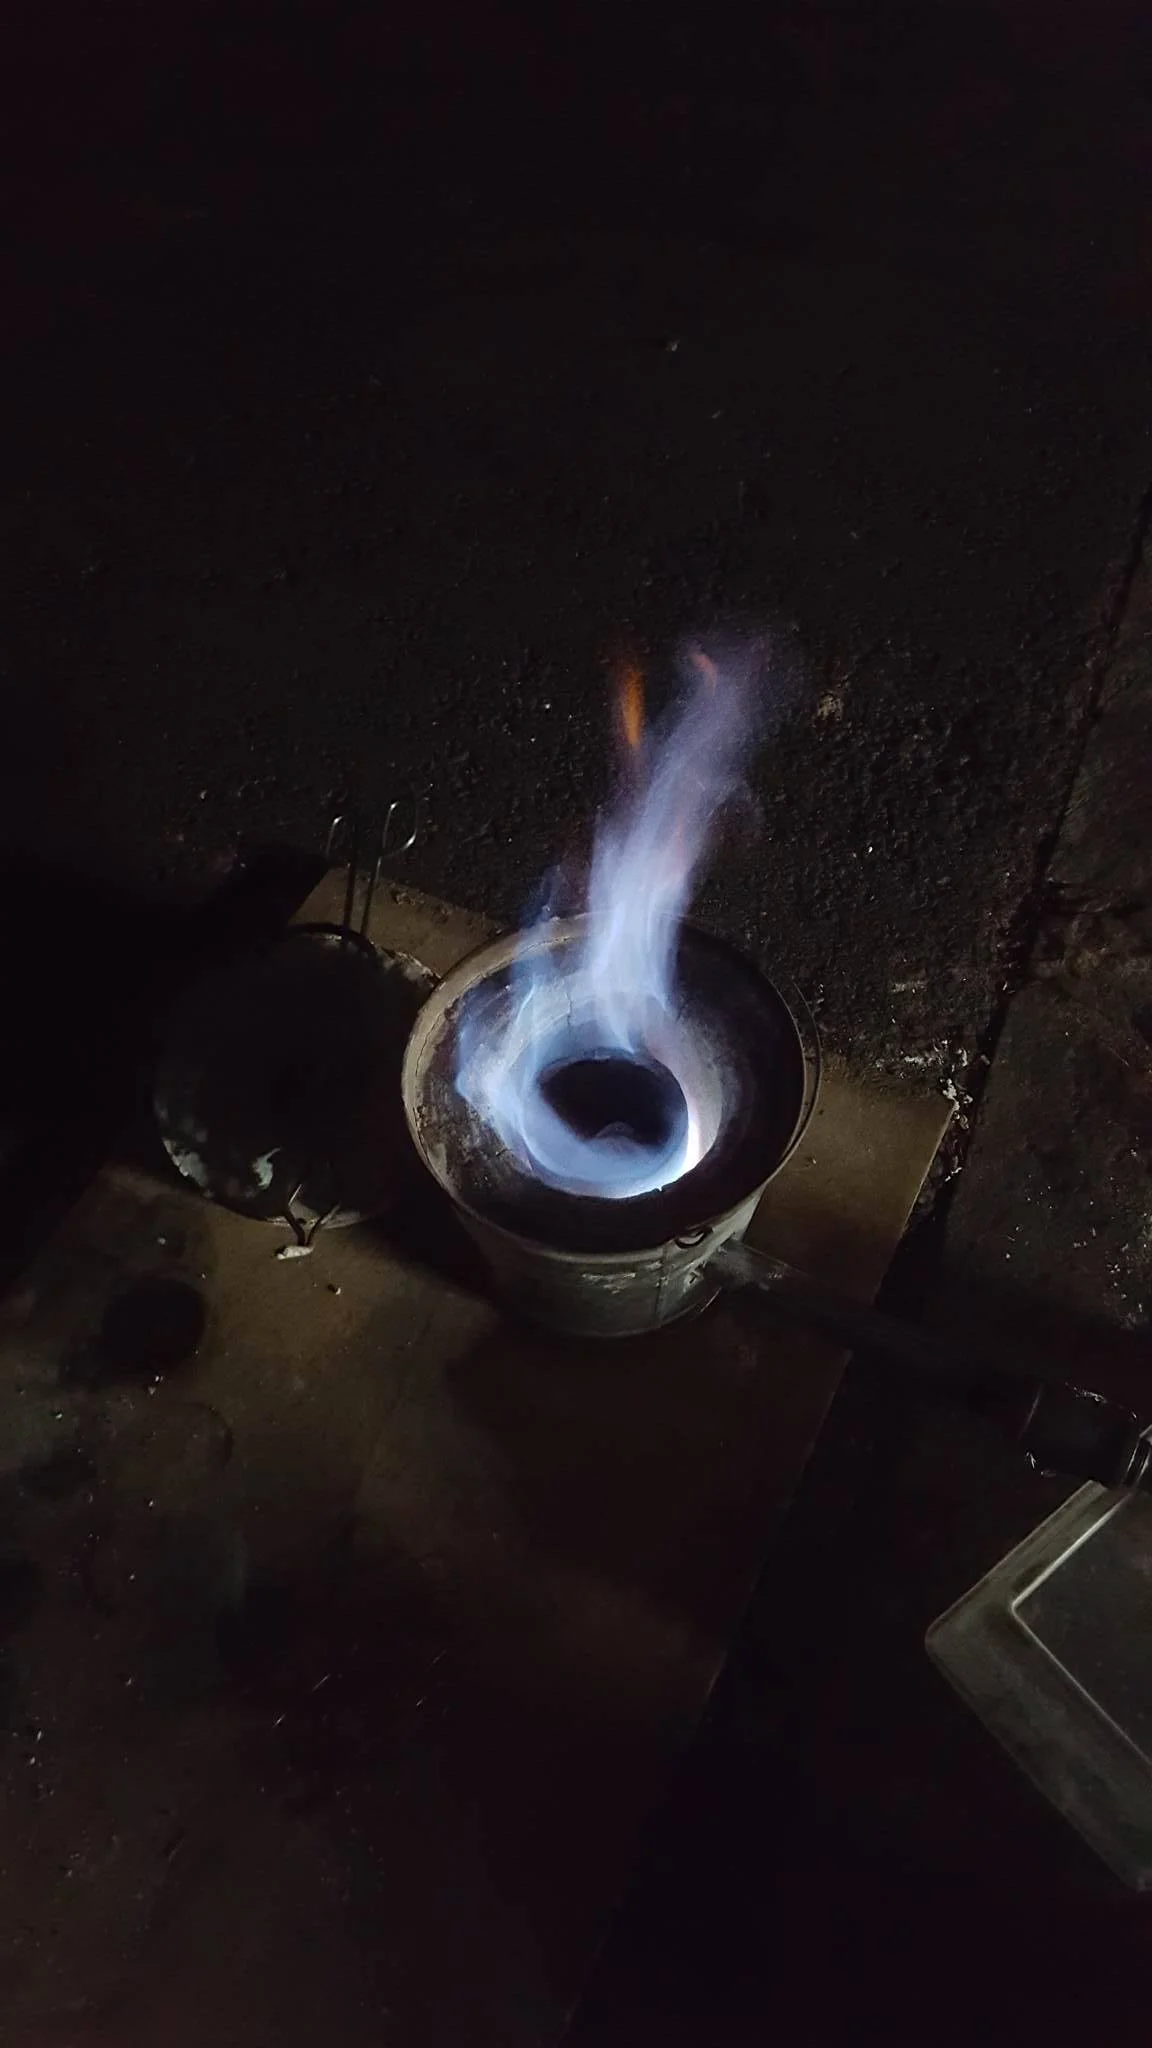
Results: After playing with the torch for a bit there's no question propane is the way to go. A crucible of aluminum melts in about 7 minutes. Copper takes a lot longer, with a crucible taking a bit over an hour, but on the other hand it's possible and the process takes less than a quarter of a 5 gallon propane tank. I did find that for longer burns it helps to place the tank in a bucket of water, to keep it from frosting over.
Build:
All told, this build takes about 30 minutes plus however long it takes your epoxy to dry. Note that in addition to the parts listed here I also added a ball valve to shut off the torch, and an upstream T section which I may in the future use for pilot light or the like. I already had those parts, but if you included those as well it would add about 5 or so dollars to the build cost. If you do not already have them, you will also need a high pressure (30 PSI) propane regulator, which can be gotten on amazon, and a 5 gallon propane tank.
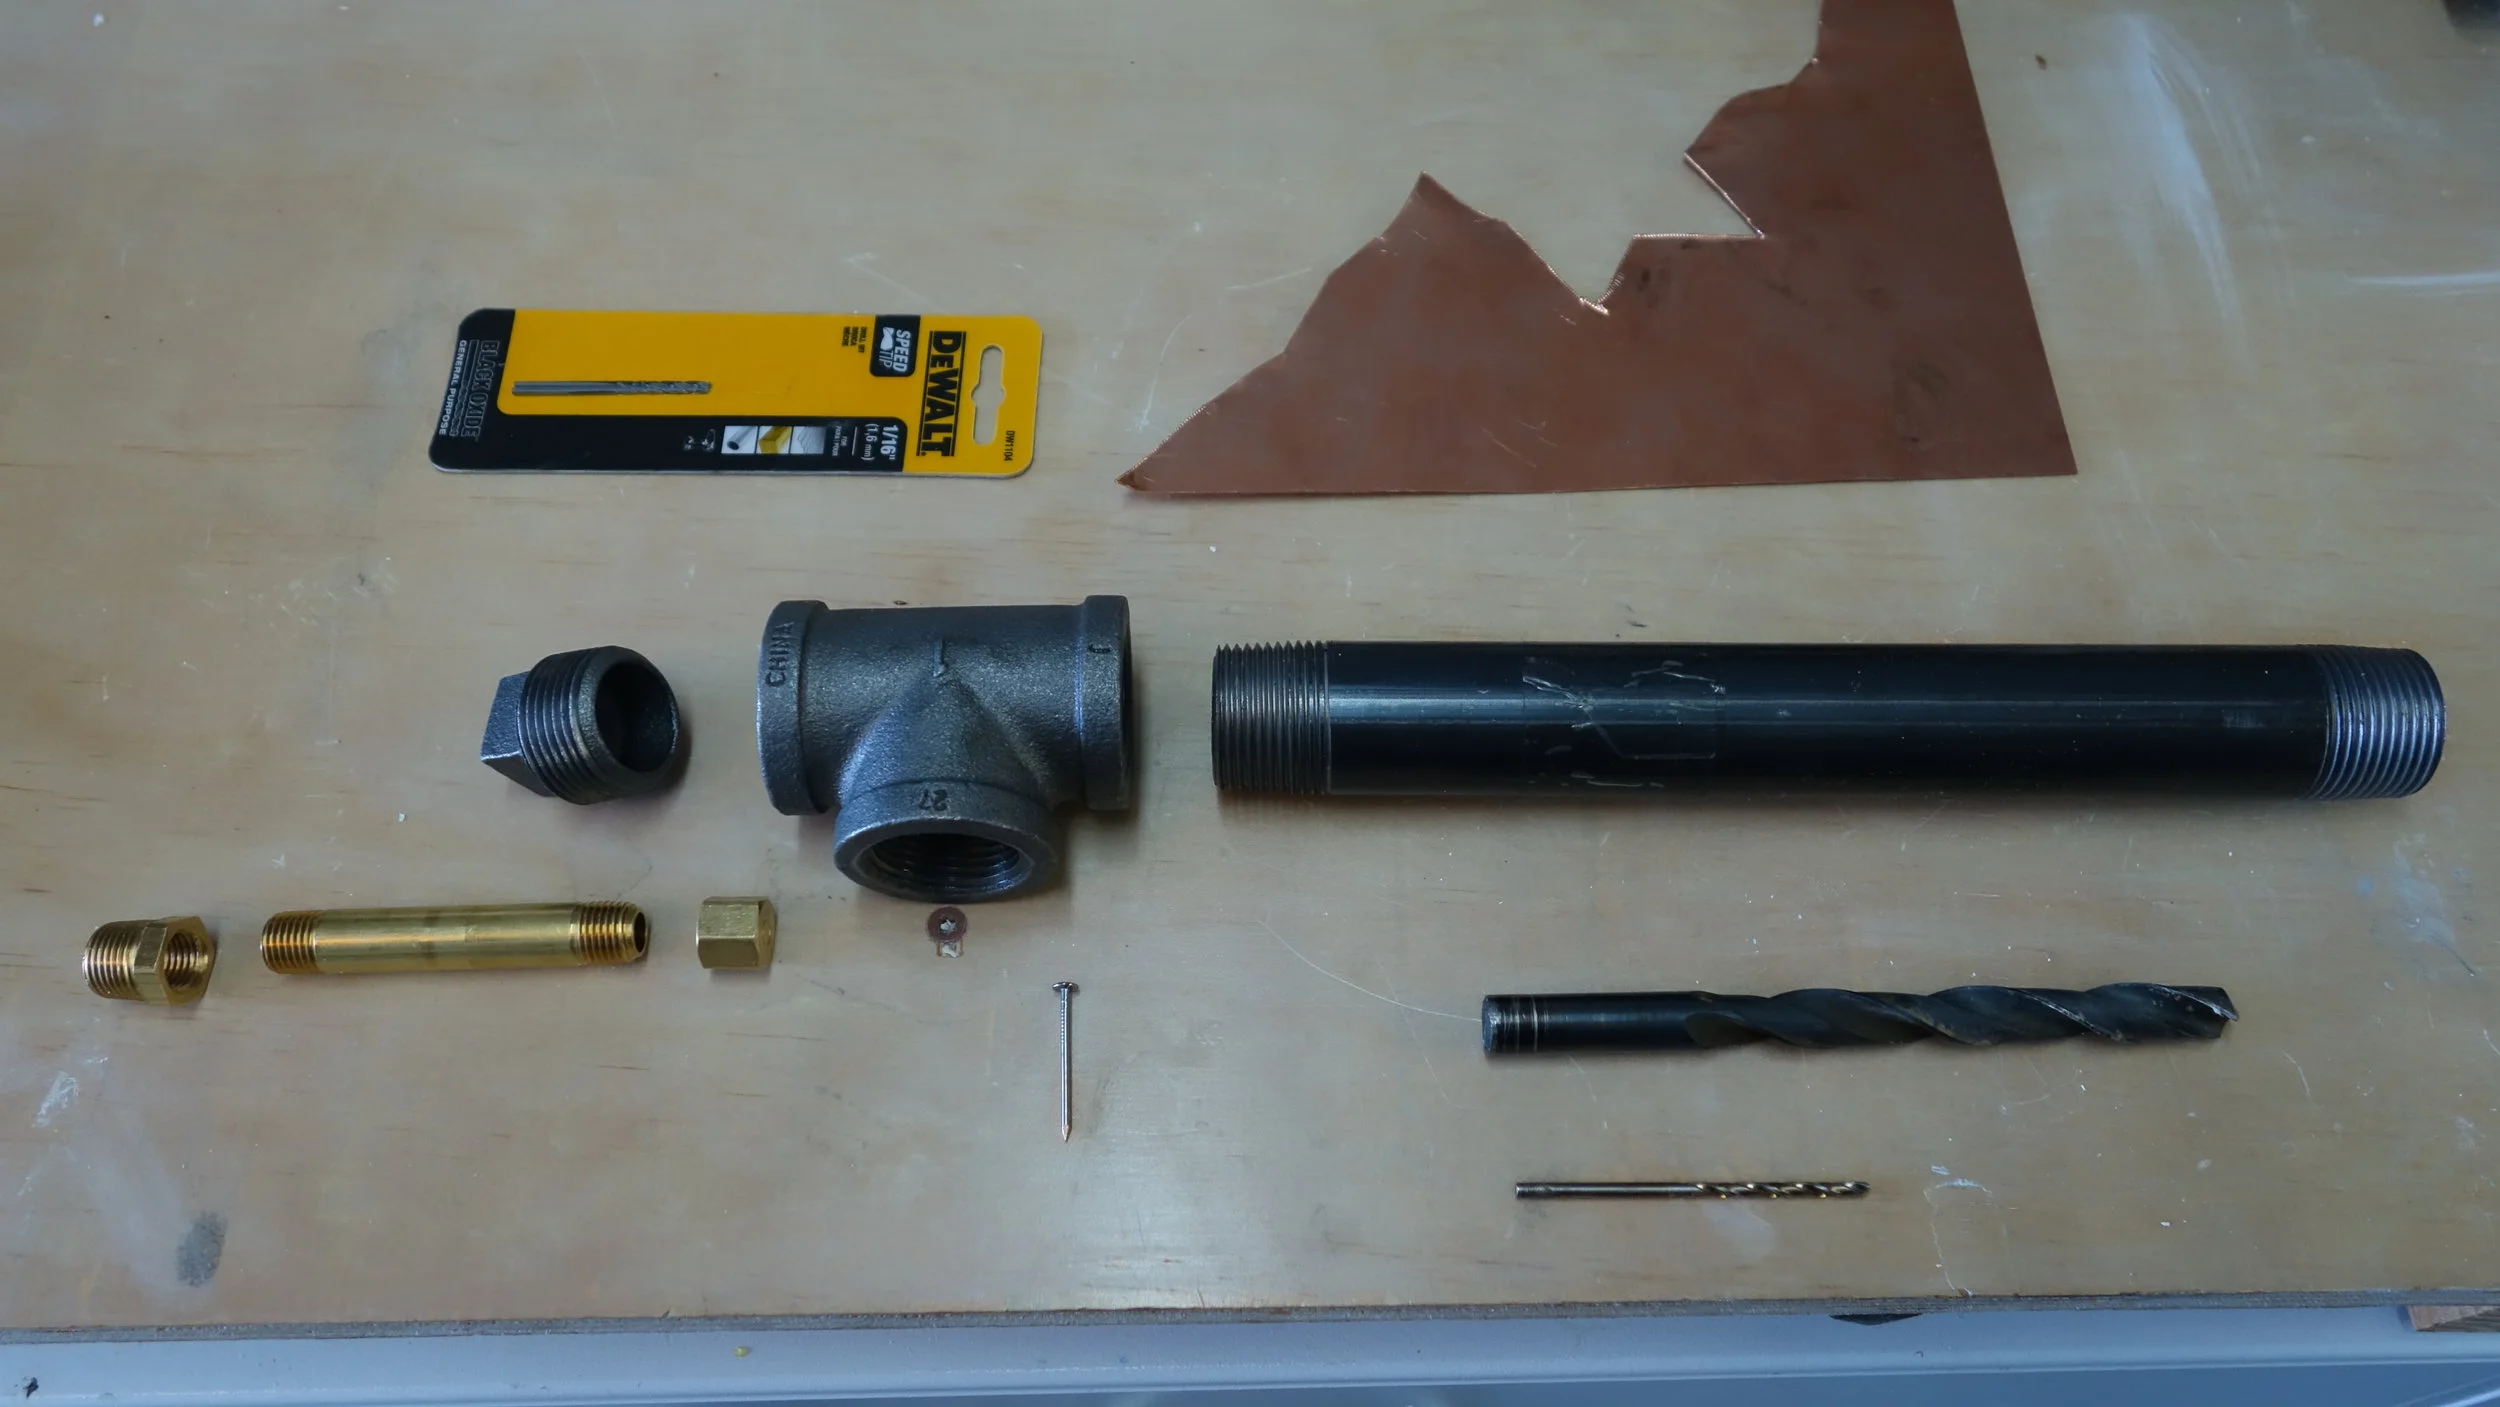
The nail, copper sheet, washer, and 1/8" drill bit were for use making an inlet cover. WIth a 1/16th drill bit that ended up not being necessary since the torch functions best with the hole almost fully open.
Materials:
- Brass Fittings: 1/2" by 3" extension, 1/2" endcap,
- Steel Fittings*:
- Adhesives: Epoxy, Plumbers tape
Tools:
*What size/type you use isn't important, but it's best to avoid galvanized.
- 1/16th (or smaller) drill bit.
- 1/2 inch drill bit (and smaller to step drill)
- Power Drill (or mill).
- grit (or similar) sand paper.
- Metal File.
Resources:
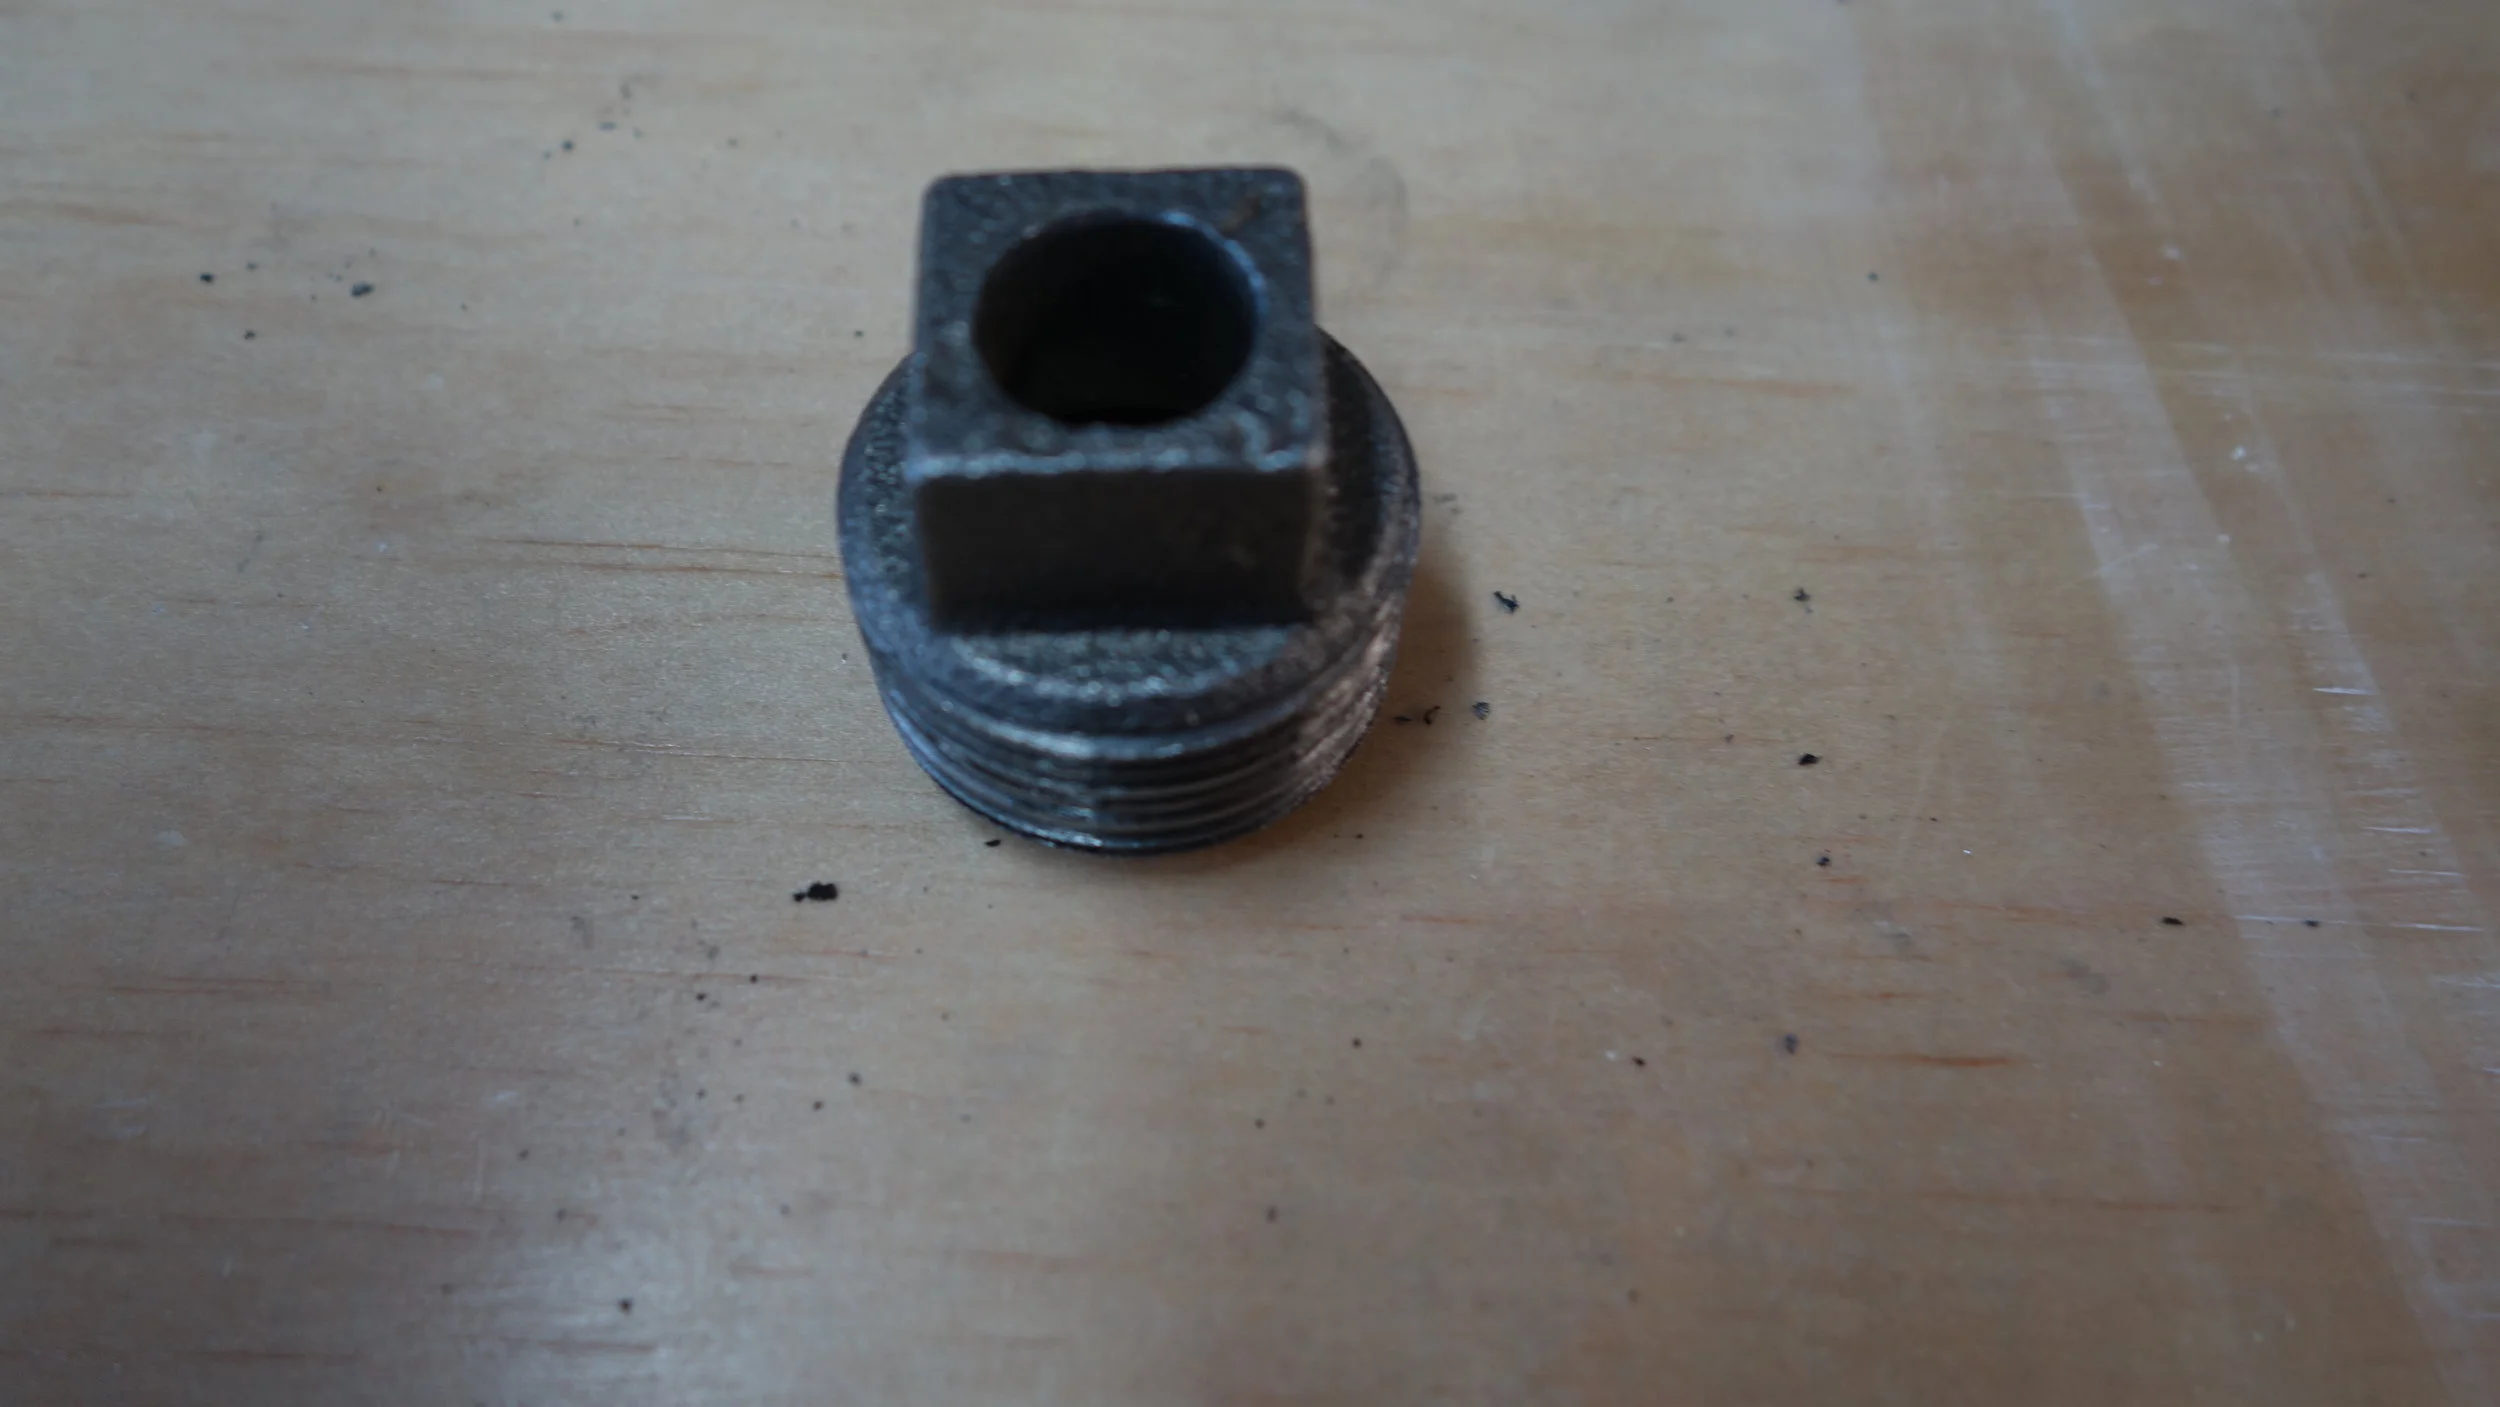
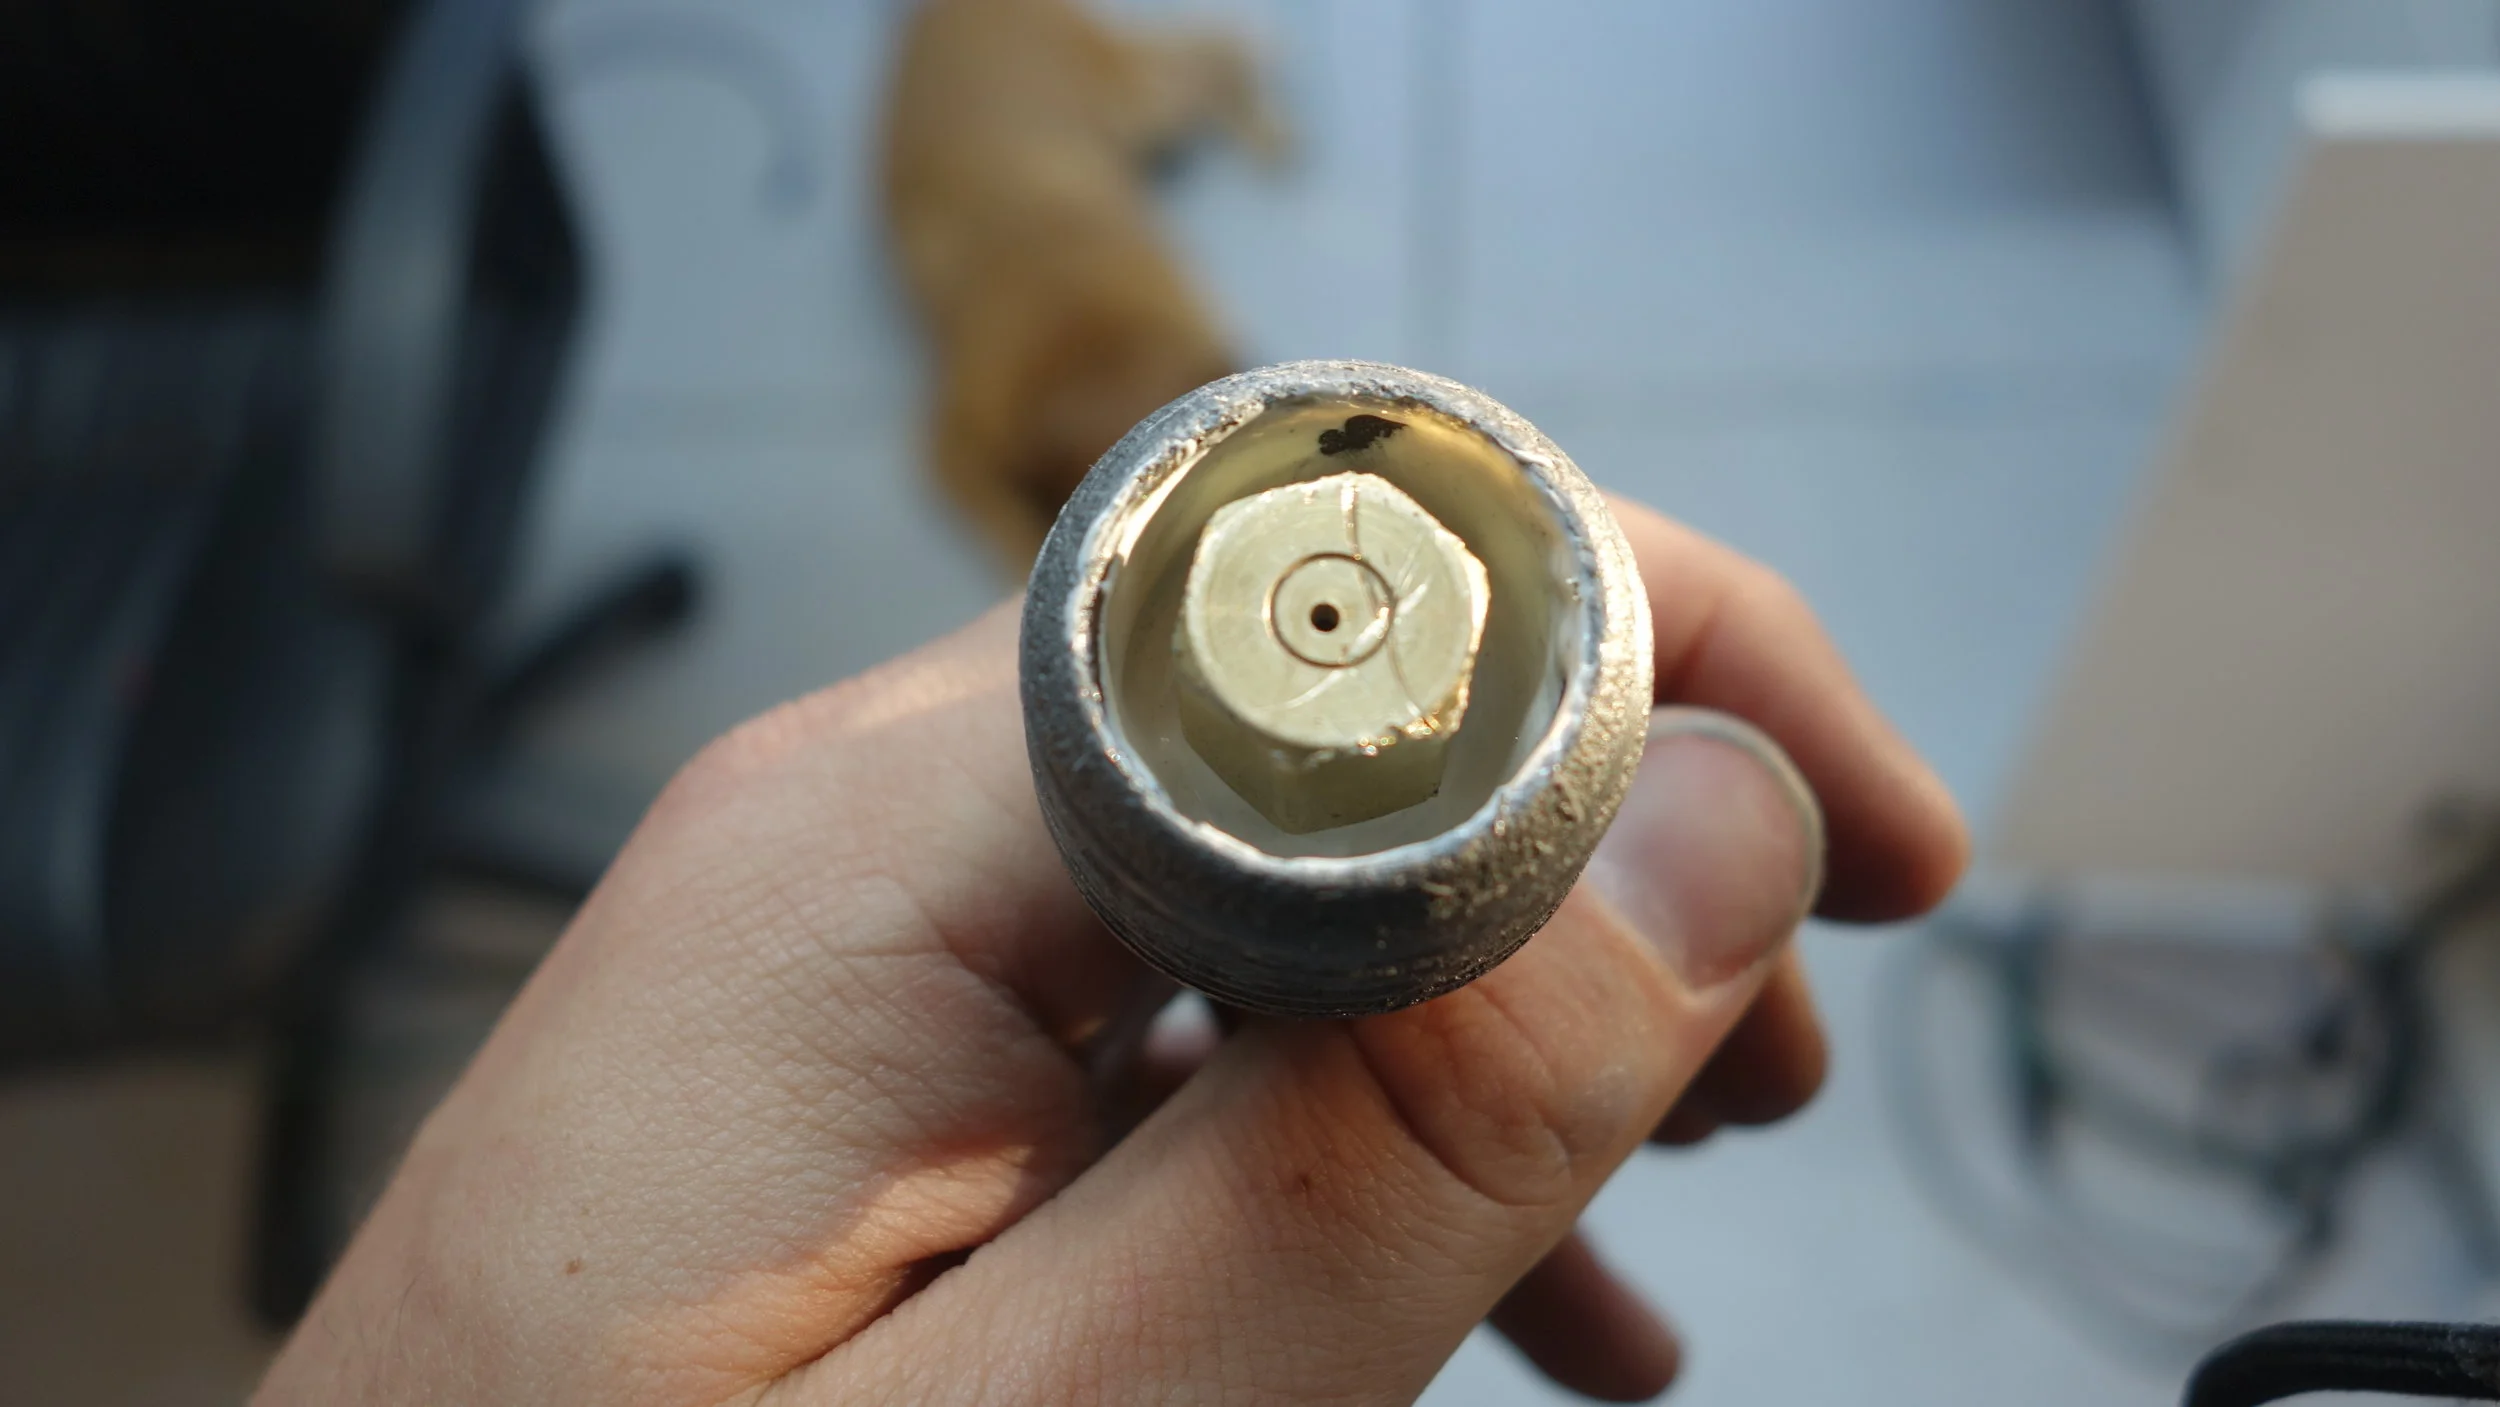
Use the 1/2 inch drill bit to create a hole in the steel end cap. Use smaller drills to step up the size of the hole as appropriate (1/4" and 3/8" would work well).
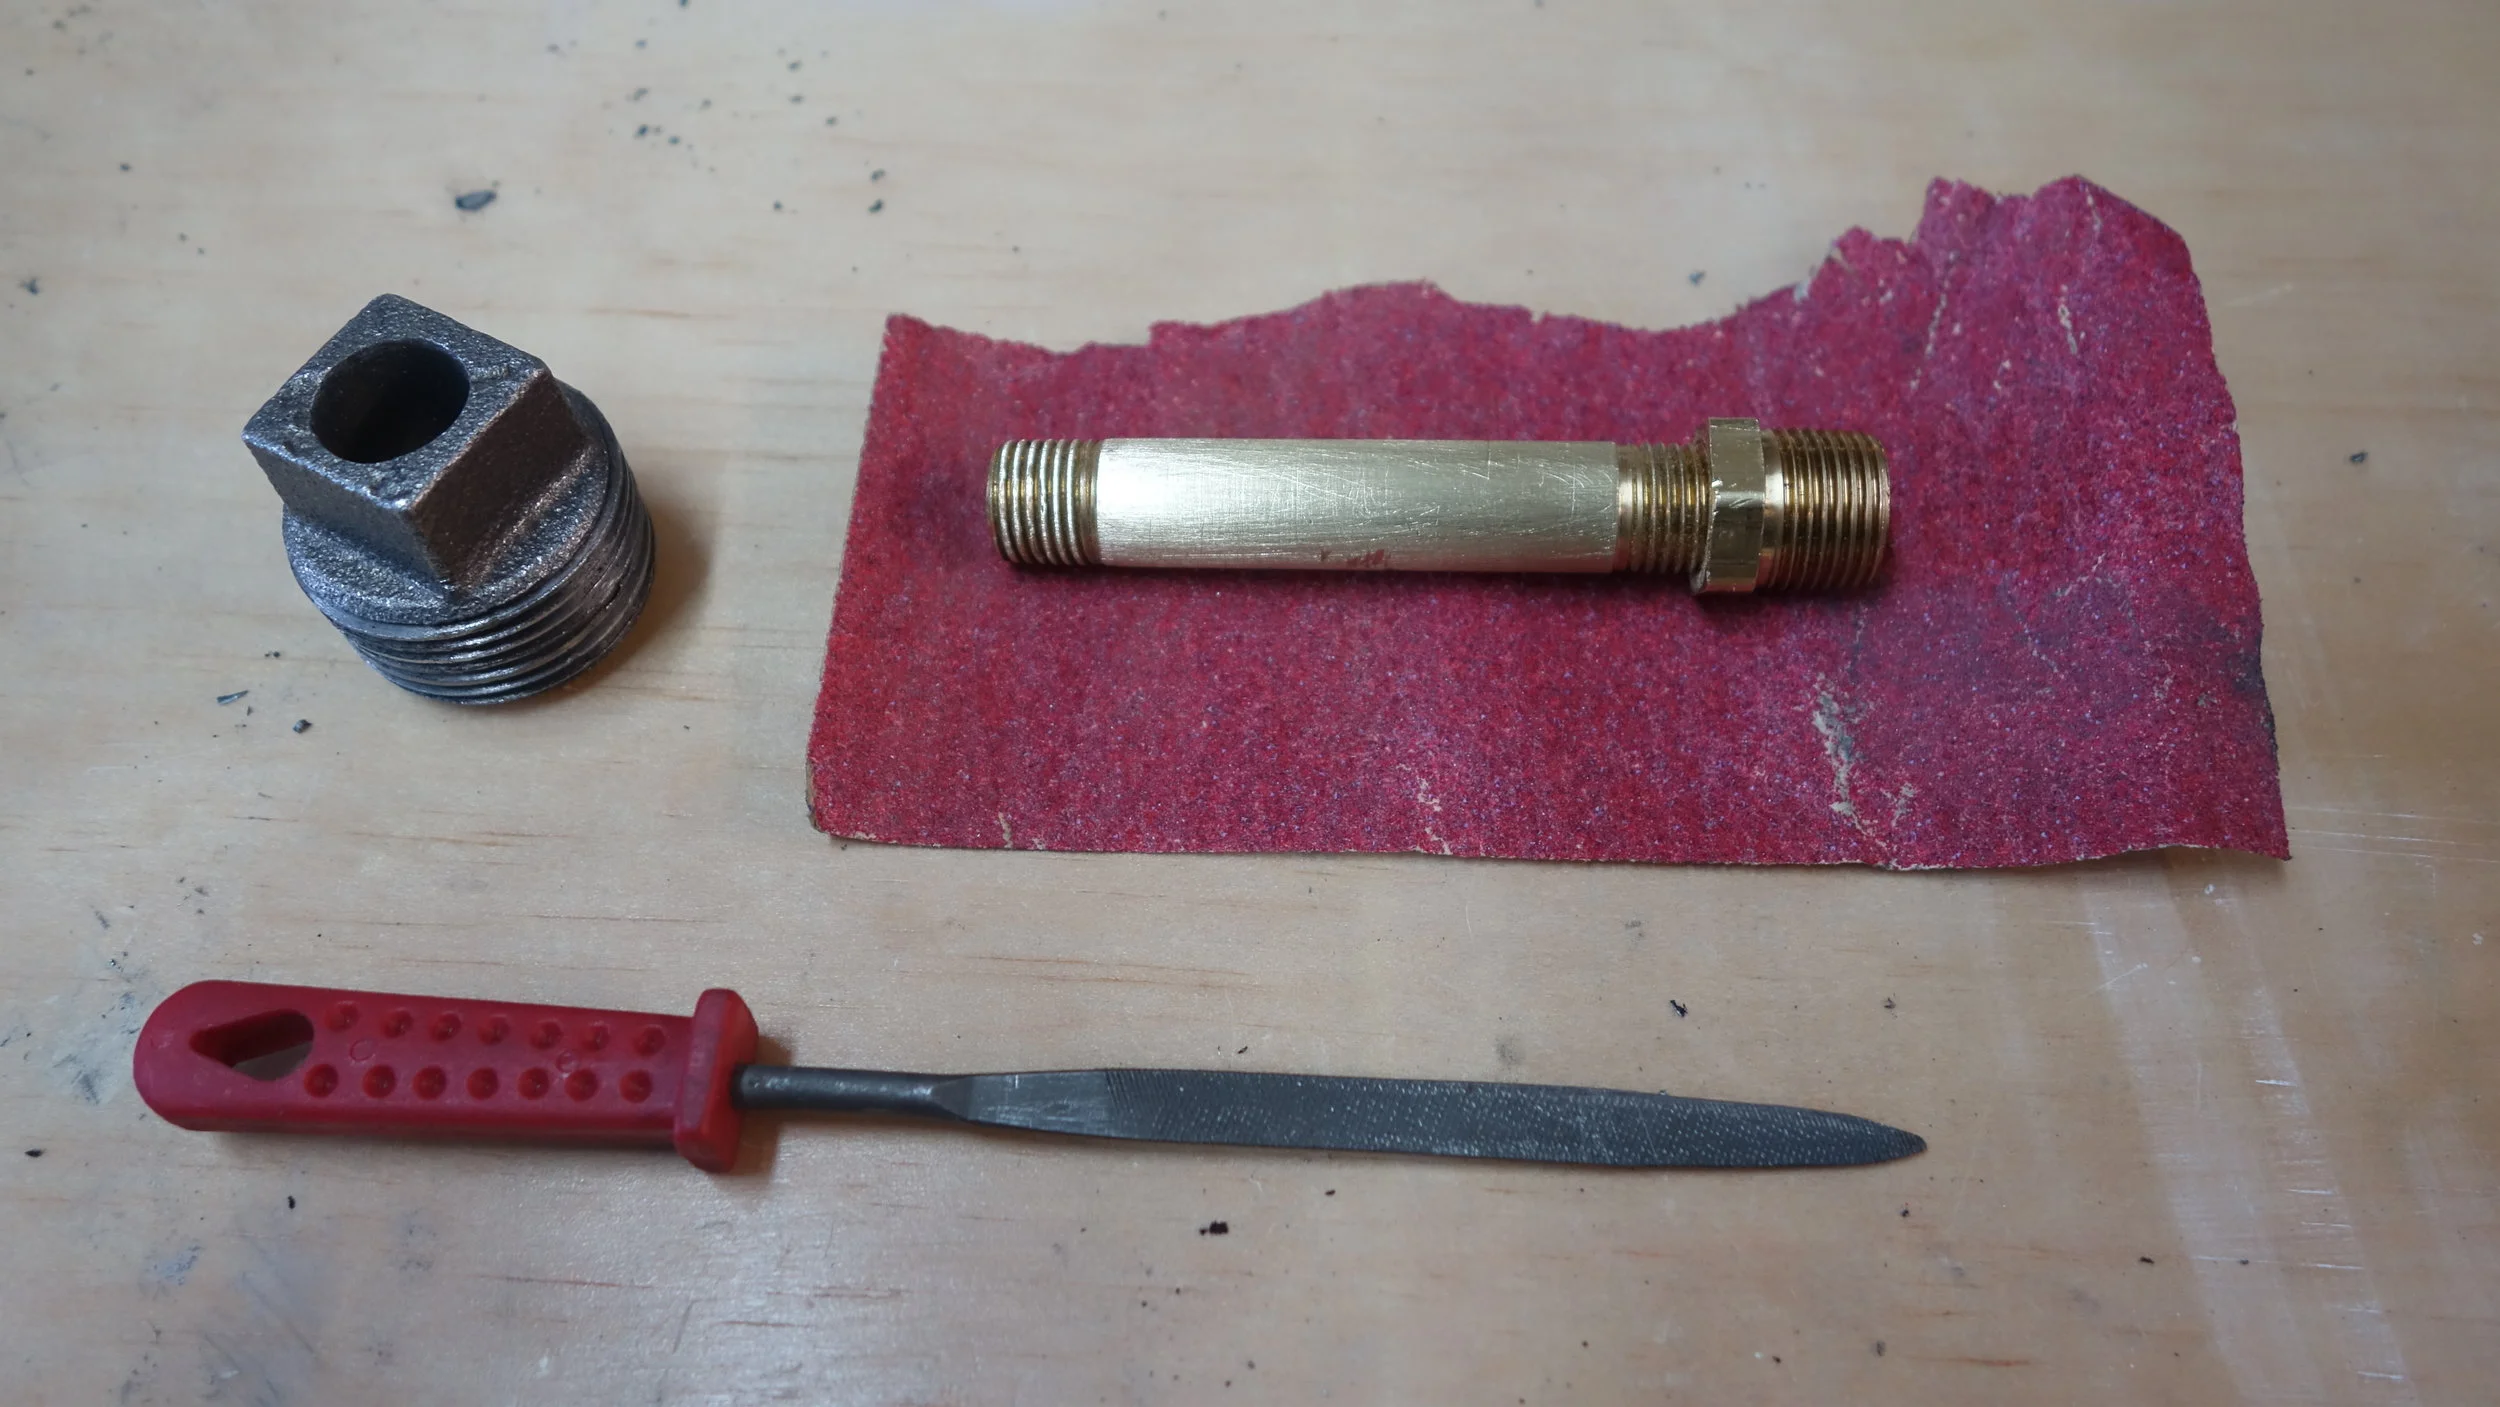
File hole and sand the extension until the two fit. Then wrap one side of the exntesion in plumbers tape and attatch the step-up fitting.
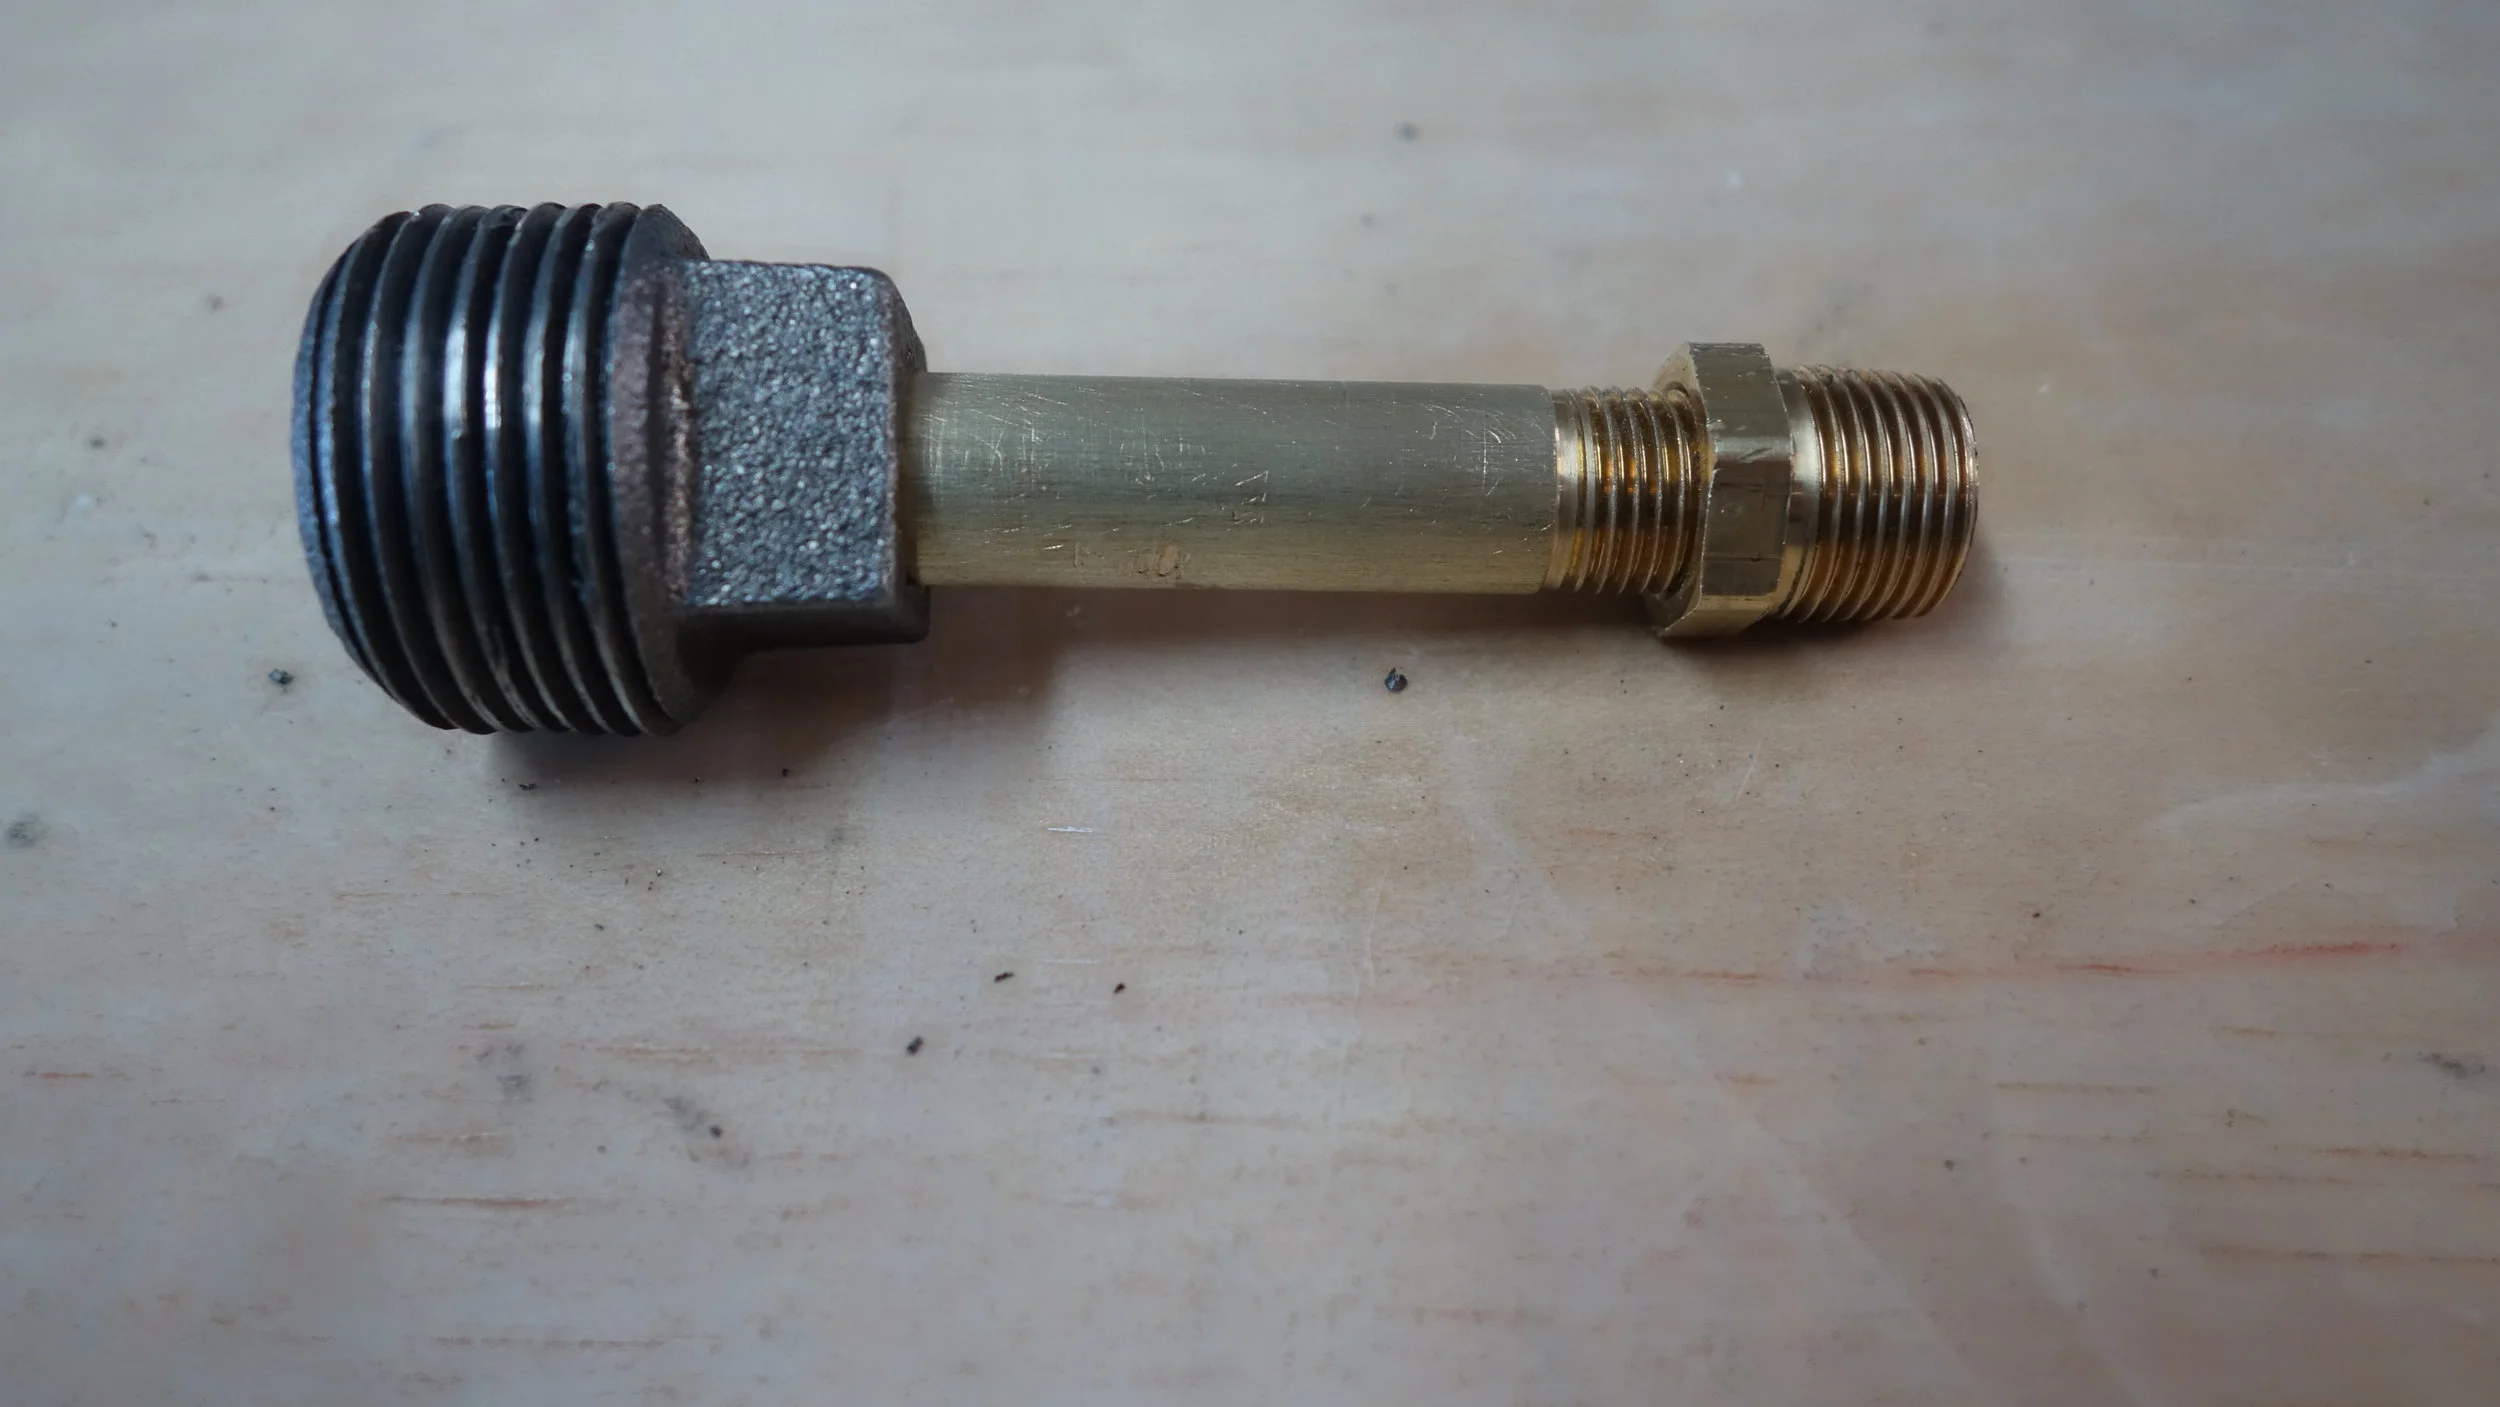
Insert the extension into the steel end-cap such that 7/8" is exposed on the other side of the cap. Use epoxy to seal any gaps between the extension and endcap (this is optional).
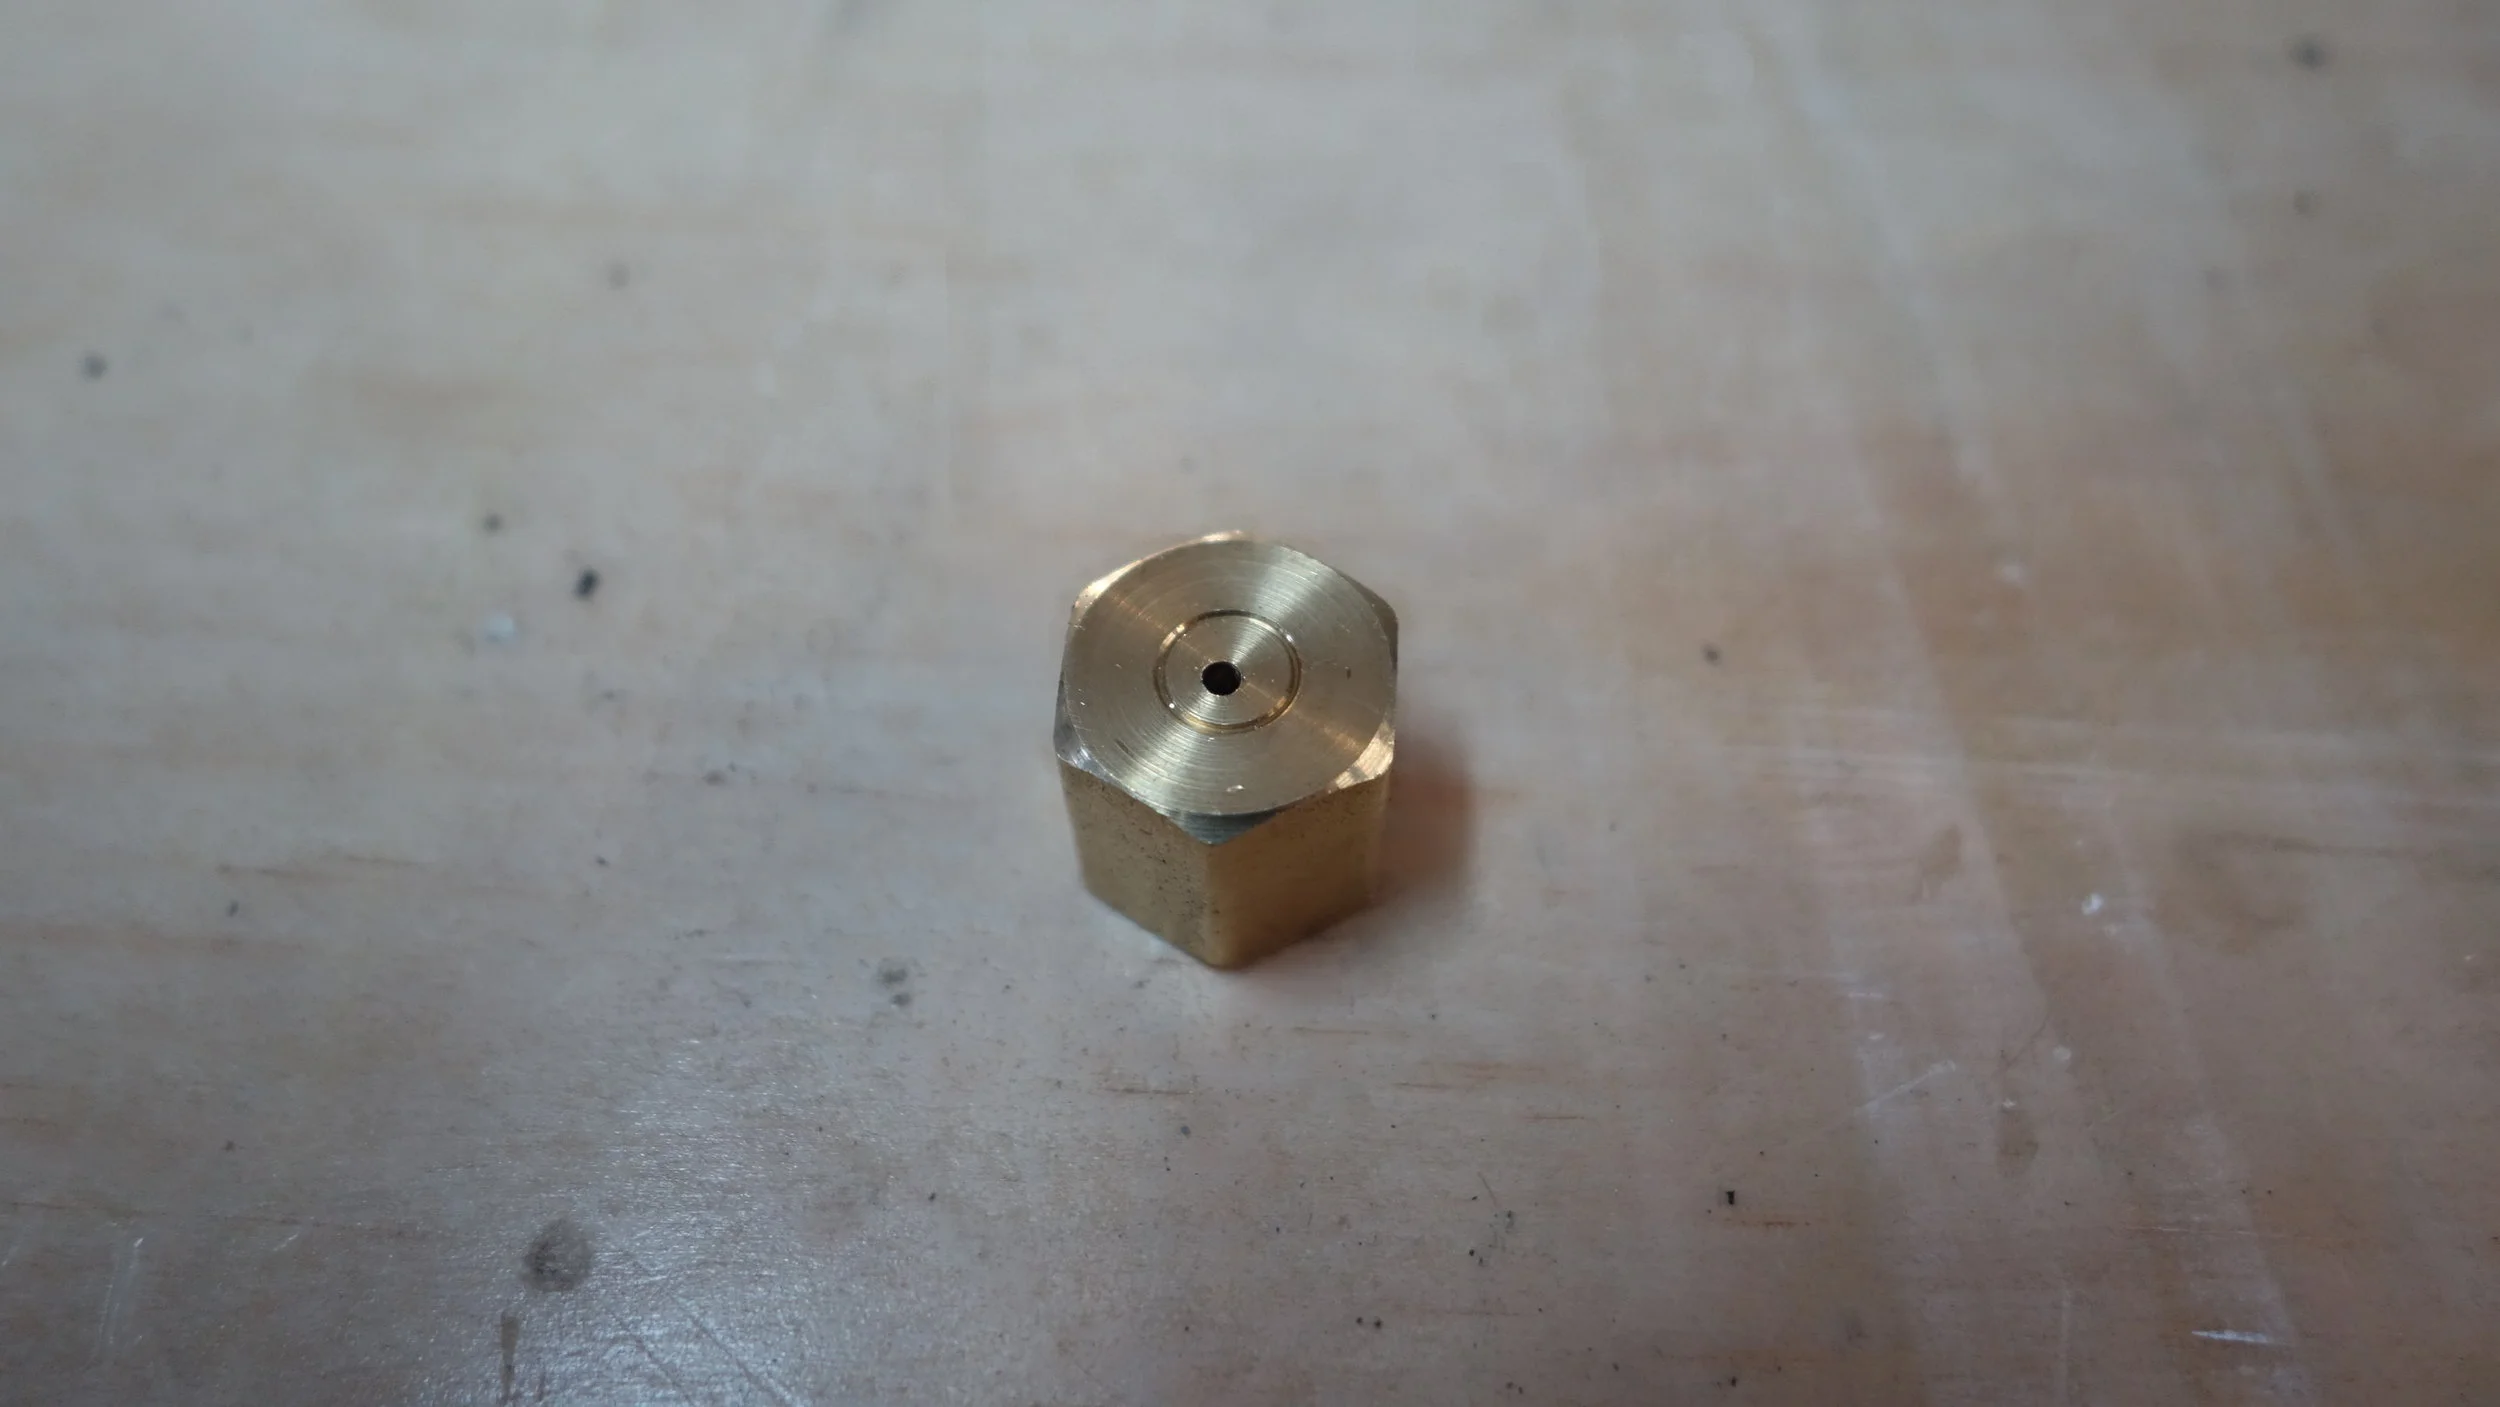
While the epoxy sets, use the 1/16th drill bit to make a hole in the center of the brass end-cap. de-burr the hole if practical. This will be the propane nozzle.
Wrap the threads on extension and screw on the nozzle. Then, connect the three pieces of steel pipe. Those connections do not need plumbers tape.
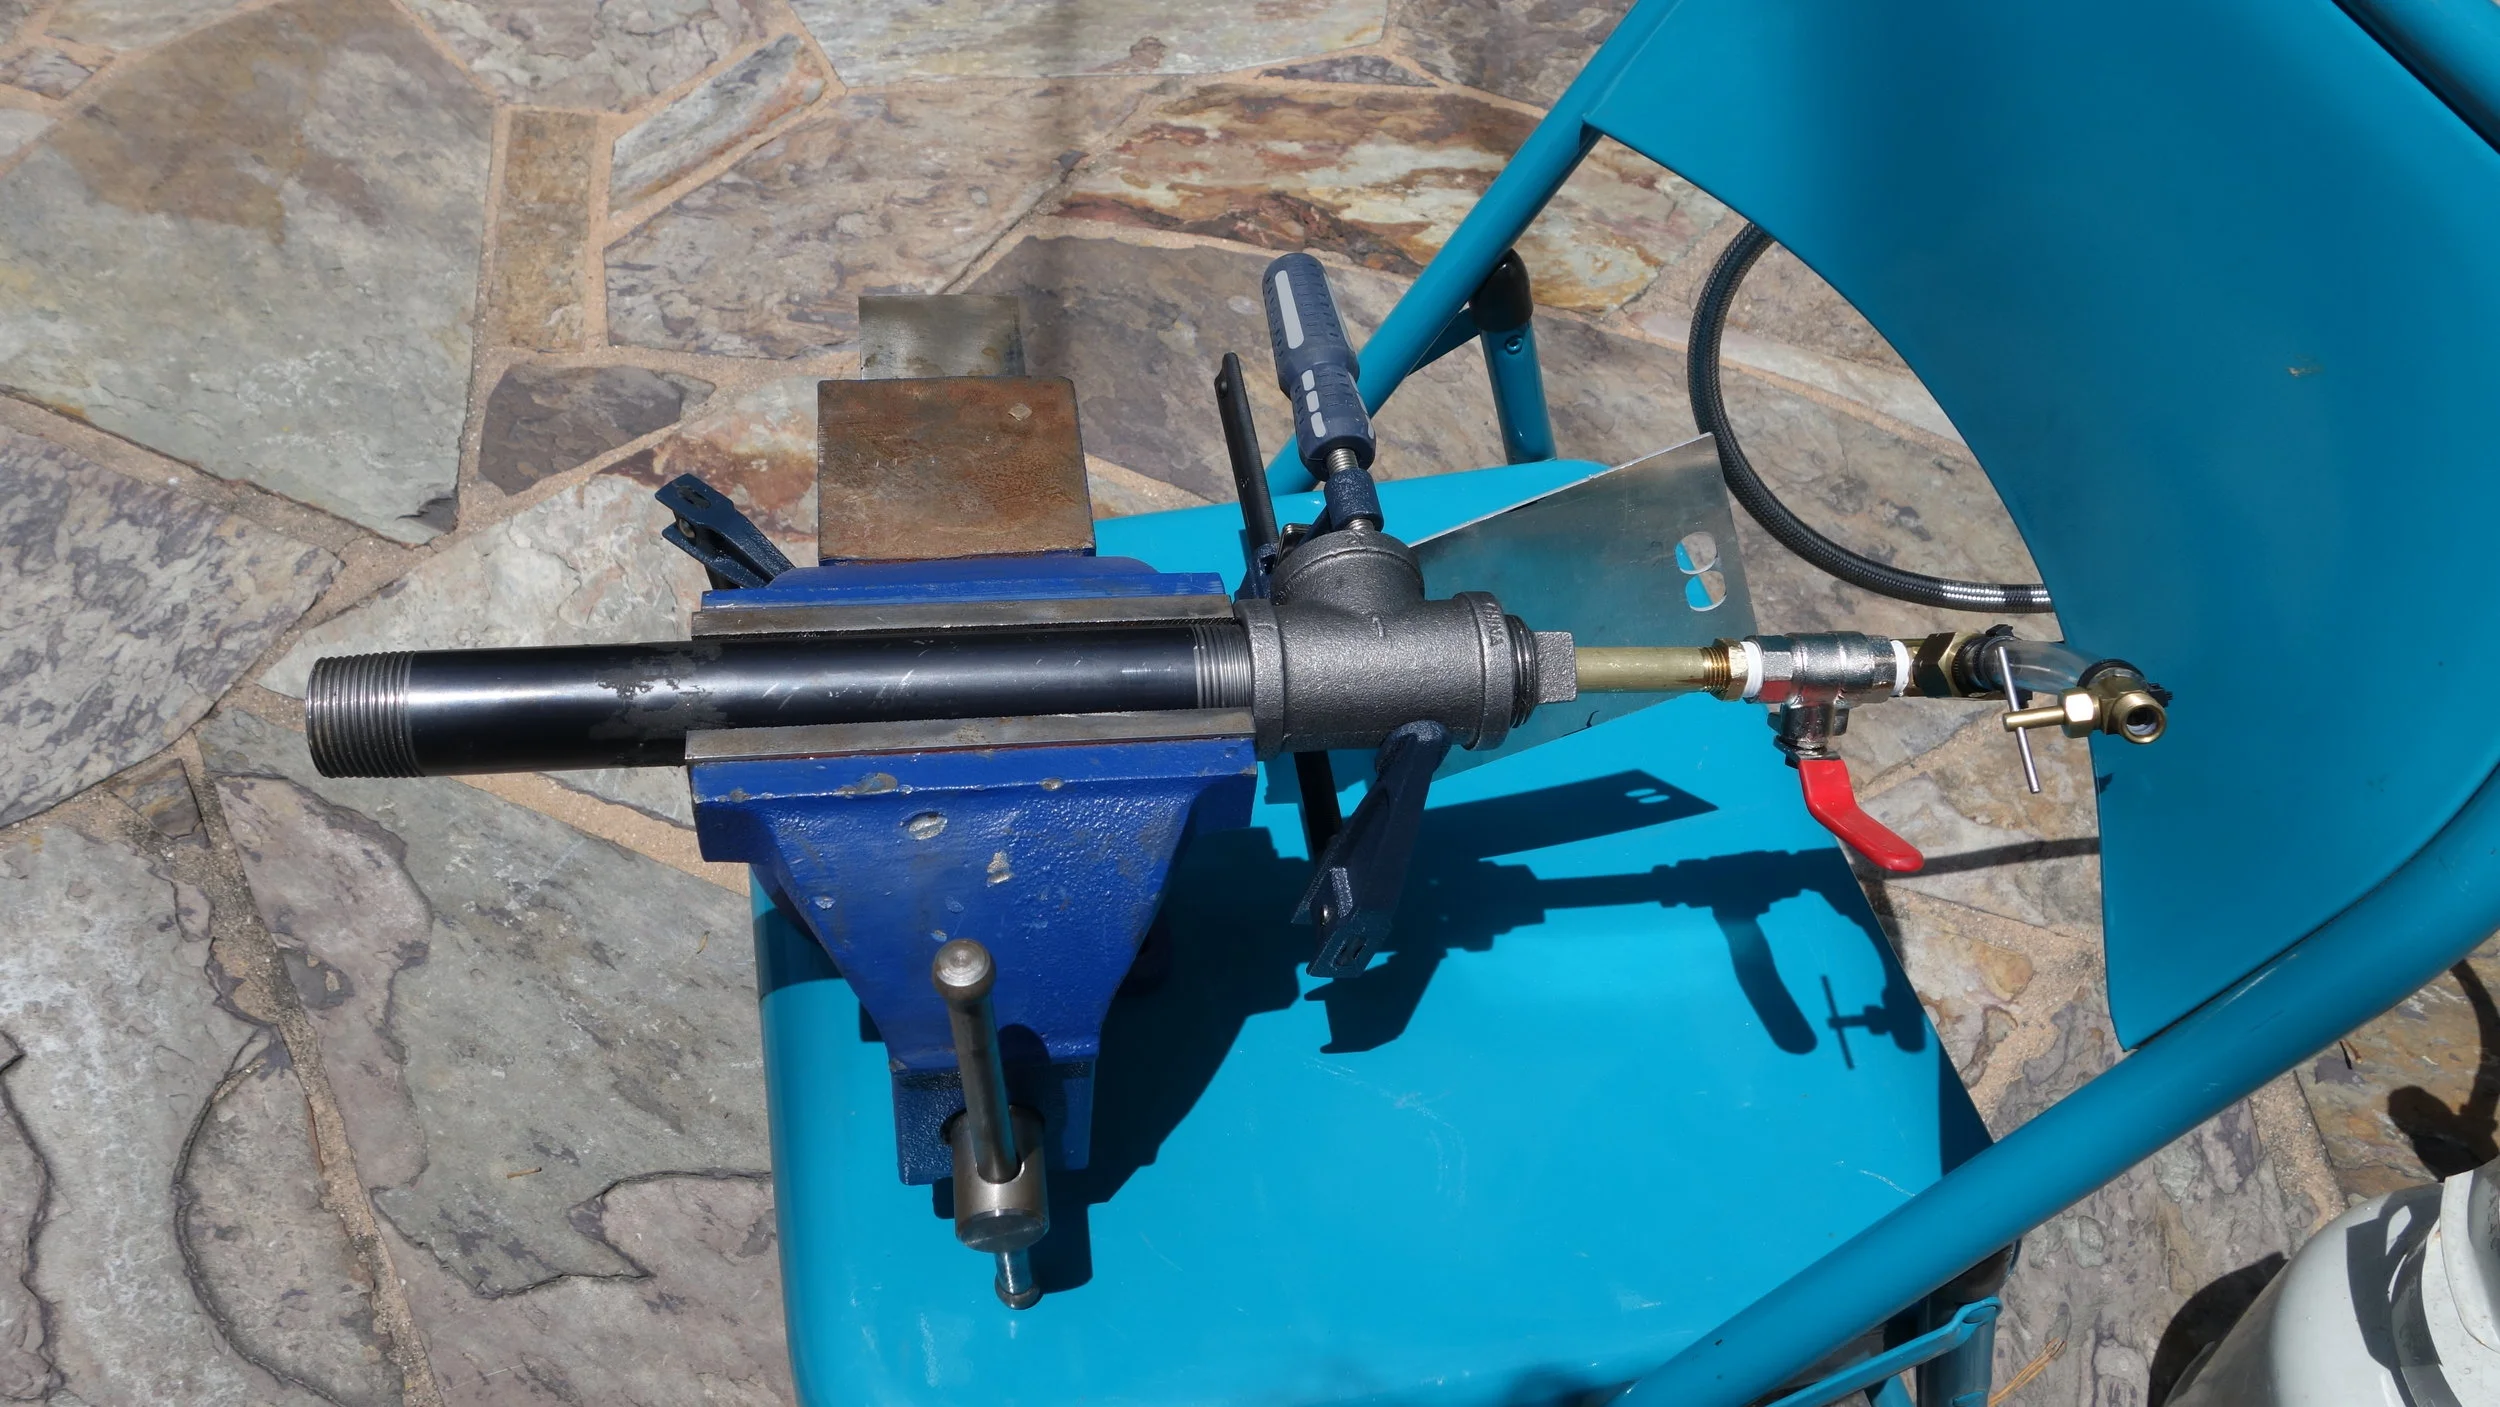
Finally, screw the steel end-cap into one side of the T-Section and the steel pipe into the other side. The torch is now ready to be connected to propane for testing.

Before using the torch for the first time, make sure to check for leaks. There are a number of ways to do this, but the one I have found easiest is to take some household cleaner product (Windex works well) and spray it over the torch. Then turn the torch on and watch for bubbles. If there are any forming, that tells you that you've got a leak. Patch with plumbers tape or epoxy as appropriate.

Airflow to the torch can be controlled by partially blocking the air intake with a piece of tinfoil or other metal (It will get too hot for tape, but not too hot to use paper or wood). The goal is a nice blue flame.